Preparing An Application to Deploy
Using dBASE PLUS 2.21 (and later)
Last Modified: March, 2004
Ken Mayer, Senior SQA Engineer
dBASE, Inc.
Printer Friendly Version
NOTE: This document is aimed at dBASE PLUS 2.21 and later releases, and deals with the new Project Explorer that was written in dBL code. There are many things that can be done with the Project Explorer, and not every option will be explored here, the whole point of this How To document is to get you up to speed as quickly as possible with the Project Explorer. If something you want to do is not covered here, or is not covered in the depth you would like, please check the help for the Project Explorer (not available in the earliest releases, but should be available soon ...), and also please use the free support newsgroups for dBASE.
Once your application is complete and ready to deploy, please read the appropriate KnowledgeBase document dealing with deploying the application (the document on using Inno Setup with dBASE PLUS).
Any developer who needs to finish their application is going to run into the fact that the process of Compiling and/or Deploying their application is not well documented in the manuals or online help (although this process is better documented in dBASE PLUS than in previous versions).
This process is actually pretty simple, but it may not appear that way the first time you try it. While you could build a 'Response File (.RSP) file and 'BUILD' (using the BUILD command) from there, it is simpler to use the Project Explorer that ships with dBASE PLUS.
It may take a bit of work, but in the long run, you are ensured that everything is set the way it should be, especially when you start looking at the DEO settings.
The instructions in this document are based on a simple application with local tables. There are more detailed things that can be done (and should be if you are working with non-local tables), and the places to handle these are pointed out but are not detailed here.
This document discusses the following topics:
Using Project Files From Earlier Versions
Starting a New Project (Includes more explanation
of the Project Explorer elements)
Creating a 'Basic' Application (Non-DEO)
Creating a 'DEO' Application
BDE Settings
INI Files
ActiveX and DLL Deployment
Network Deployment
Following along you should be able, when done, to create a project file and build/compile your application, and be ready to deploy it.
Using Project Files (.PRJ) From Earlier Versions
The Project Explorer will handle older Project files. There are some differences in behavior that may be confusing at first, but we will hopefully cover those as we go. You should find the new Project Explorer easier to use than the older one. (It is more stable, and you can run/design elements of your application directly from the Project Explorer.)
Non-English Users: There is a known issue with older Project files and the first line in the file, if you use a language other than English as your default. The first line of the file needs to be translated to English for the new Project Explorer to be able to deal with it. The line should look something like:
Project File generated 03/23/2004 16:25:28
The Example
For the example, we will use a working application I created in earlier
versions of dBASE, "Vesper", and the PRJ file that was created for that
version.
Starting dBASE PLUS and moving to the appropriate folder, you should see in the Navigator something like (note that if you don't have the Vesper application, don't worry -- the same steps can be used for any application ...):
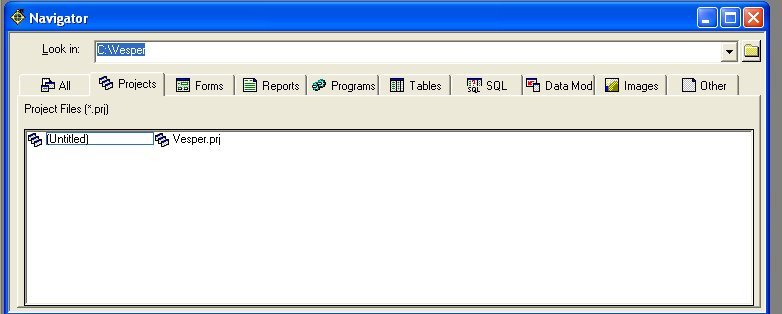
Navigator
There is a .PRJ file here, which is the one that was created in dBASE PLUS 2.01 (an earlier release of dBASE) using the original Project Manager.
Relative Paths
One problem you may have -- the old Project Manager used a lot of "relative
paths" when it wrote filenames into the .PRJ file. This may cause some
problems with your application, as the new Project Explorer does not currently
understand relative paths. (A "relative path" is one that uses ".." type
syntax to refer to folders, and does not hard-code the full path to a
file, such as "C:\" to refer to the hard drive, or to some other path.)
The simplest solution to this is to modify the source for the Project before opening it in the Project Explorer.
To do this, open the .PRJ file in the Source Editor in dBASE, using one of the following methods:
- Right click on it in the Navigator, and select "Open in Source Editor" (or press F12)
- In the Command Window, type: MODIFY COMMAND projectname.prj (i.e.,
MODIFY COMMAND VESPER.PRJ)
I won't list the full contents of the project here, but a few entries from the [Contents] section will give you an idea of what needs to be done:
[Contents]
inventor.wfm,0,0
Library.wfm,0,0
roster.rep,0,0
..\dUFLP\custbutt.cc,0,0
vesper.ini,0,0
..\dUFLP\preview.wfm,0,0
..\Program Files\dBASE\Plus\dBLClasses\FormControls\Seeker.cc,0,0
Note toward the bottom of the listing "..\dUFLP\filename ...". These files may cause a problem. The simple solution is to change the path to match.
In this case ".." refers to "C:\" so replacing ".." with "C:\" will solve the problem. You may want to check to make sure you change the appropriate paths in your own Project Files.
Changing ".." to "c:\" for the path to "Seeker.cc" in the above will also work.
Once you have completed this, save the changes you just made and exit the Source Editor (Ctrl+W will accomplish both of these steps at one time).
Open the Project in the Project Explorer
You can open the project by double-clicking on the project file in the
Navigator, right-clicking on it and selecting 'Open Project', clicking
on it once and pressing the F2 key ...
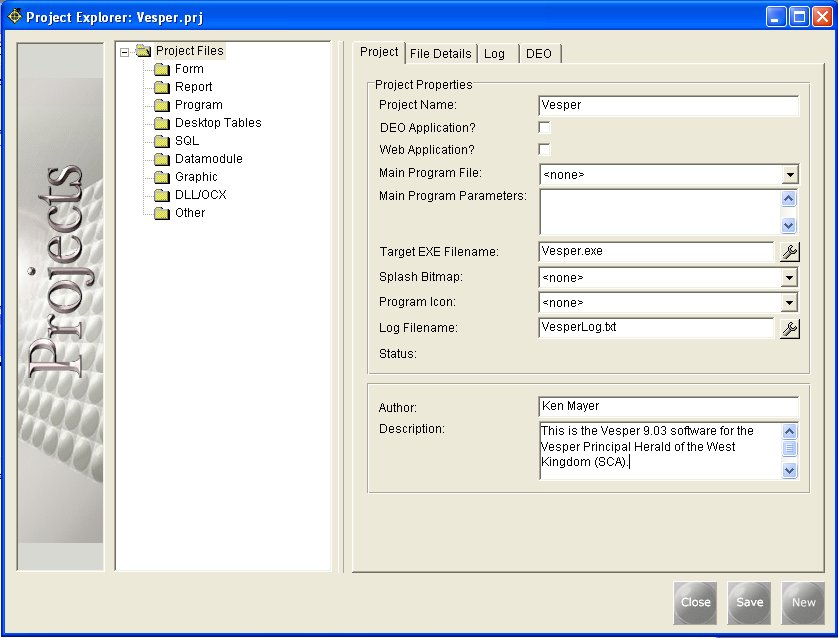
Once you open it and it reads the contents of the .PRJ file in, you should see something like:
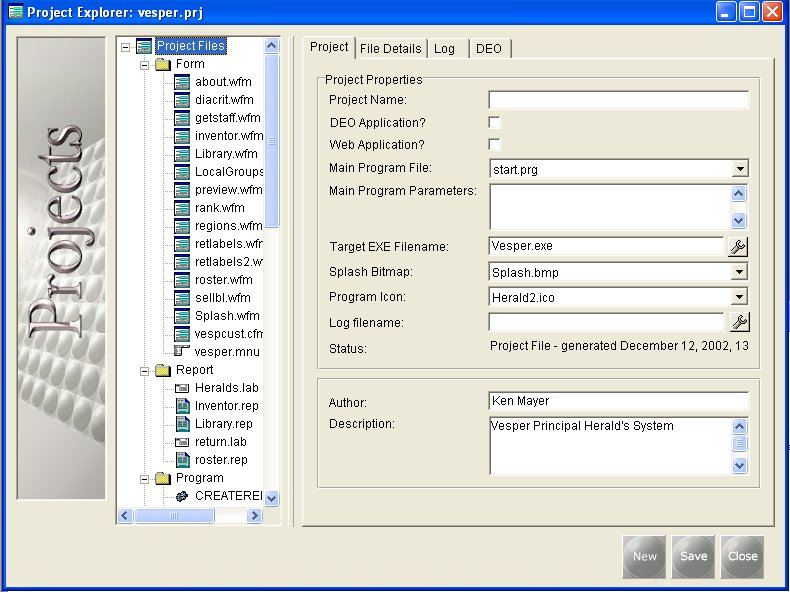
Vesper Project
Note that on the main page of the notebook several items are filled in automatically for you. These pieces of information were taken from the original project. There are other things we will look at, but this is a start.
Also note that your files are listed in the treeView on the left -- this listing is all the files that were listed in your original project, and they should be grouped pretty much the same as they were in the original.
One big difference you will see is that items that used to come up only if you selected "Project Properties" in some fashion (right click, etc.) now all appear on the main Project display.
With the project up, we need to look at the settings for individual files.
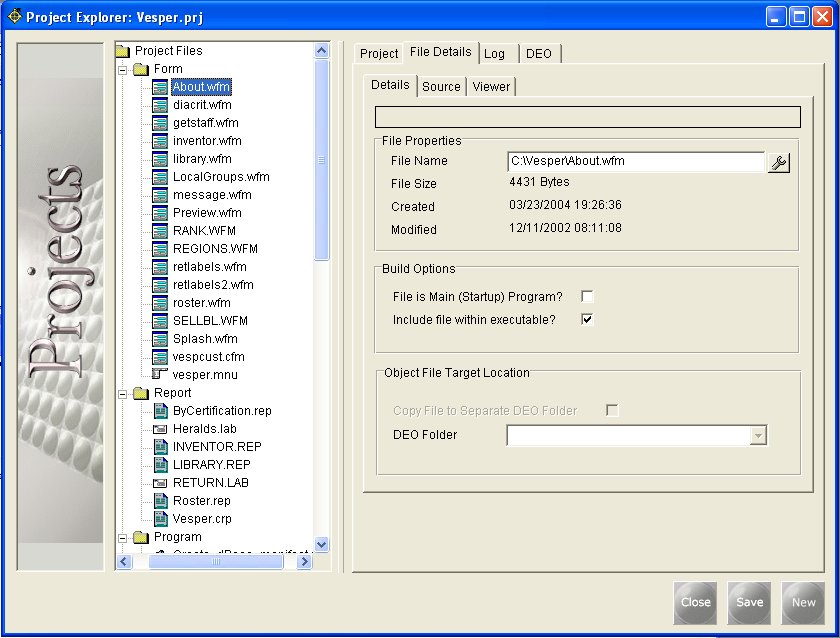
File Details
Note that you can view this option simply by clicking on a file that is
listed in the treeView on the left. The Project Explorer automatically
shows you the information available.
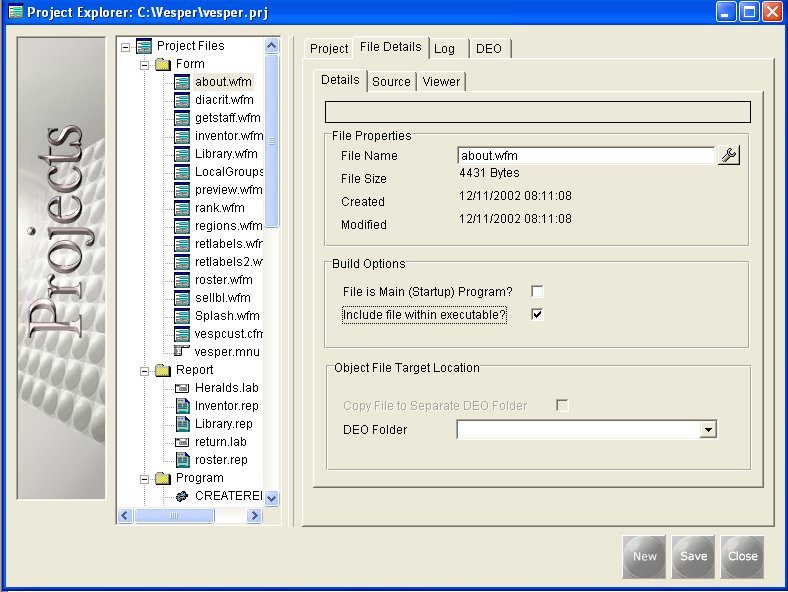
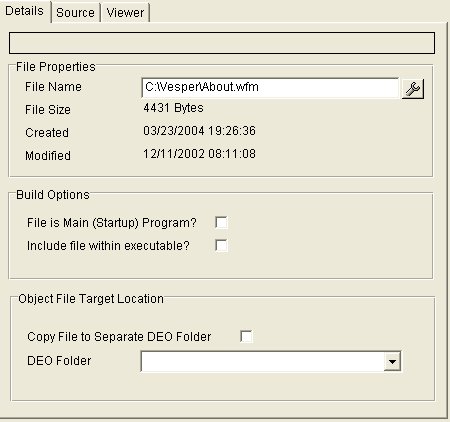
Vesper Project - File Details
For the moment we're not going to worry about the "Object File Target Location" -- this has to do with DEO applications, and we aren't concerned with that just now. (This will be discussed later in this document.)
Build Options
Note the checkboxes in the middle section "Build Options". There are only
two, but they're important. The first one designates a file as the first
one to be run when the application is run ("File is Main (Startup) Program?").
This should be checked from the original project, unless you had not specified
the startup program.
The second checkbox is important because it tells the Project Explorer whether or not to include the file when building it. Depending on the type of file:
- Source Code: Forms, Custom Forms, Reports, Custom Reports, Labels, Programs, Datamodules, Custom Classes -- if this is checked, dBASE will compile it, to create the appropriate object file (.wfo, etc.). It will then, when the executable is created, build (or perhaps the word 'Bind' is more appropriate) the object files into the .EXE.
- Object File: If the file is a dBL object file (a compiled form, etc.), the Project Explorer will not attempt to compile it (as that is not necessary), but will build the object file into the .EXE.
- Other Files: These might include ActiveX, DLL files, header files, other types of files that you might include. The Project Explorer will, if this checkbox is checked, build (or Bind) the file into the executable. Why would you want to do this? You might want to ensure you have a non-corrupted file available, and through the use of the dBASE COPY command, copy it out if needed so that your user(s) may use a clean copy. (This is covered elsewhere -- see the online help on the use of the file object's copy() method.)
Source
The tab of the notebook for "File Details" allows you to view the source
code for your file (only if the file is dBASE Language source code). This
is handy, but note that this is a read-only viewer. This does not allow
you to edit the source code directly.
If you wish to edit the source code for a file you will want to right-click on the filename in the treeView, and select the option: "Open in Source Editor".
Viewer
The 'Viewer' option will attempt to allow you to view your form, report,
labels, and even image files, depending on the file type(s).
Building the Executable
All of the above said ... let's take a look at building the executable.
In theory there is nothing you need to do here for your old project to work properly. However, you may want to do the following two items:
- Give a 'Project Name' in the entryfield for it on the 'Project' tab.
- Give a 'Log filename' in the entryfield for it on the 'Project' tab.
In this case I'm going to be lazy and simply use 'Vesper' for both.
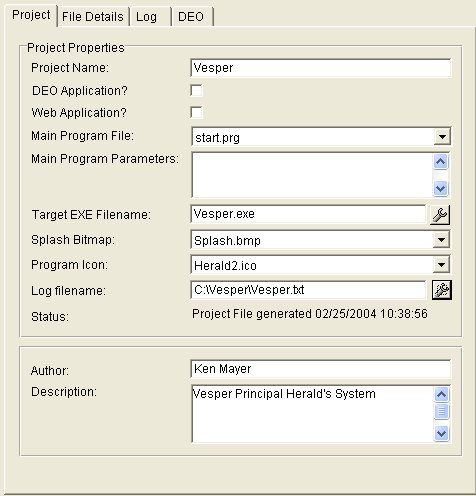
Vesper Project - Project Tab
The reason to give a log filename is so that the Project Explorer has a place to display any errors it encounters when attempting to build your application.
Once you have these items filled in, building an executable should be as simple as selecting the 'Build' menu, and then 'Build' or 'Rebuild All' options. There is some confusion about the difference between these two options.
- Build - assumes that all of your files have been compiled, and it just builds the executable -- it will return an error if an object file cannot be found.
- Rebuild All - recompiles all files that can be compiled, if using DEO (see later in this document) it copies the appropriate files to the appropriate folders, and builds the .exe file.
It is recommended that you use 'Rebuild All' if you have changed any files in your application. Of course, if you have made a change in only one file and you have a large project, you can save time by just right clicking on the file and selecting "Compile ..." from the popup menu.
Note that if you changed anything you are asked to save. It's a good idea (select 'Yes').
Unless there's an error you should see a message telling you that the executable was built. From here you can test it either by going to the Windows Explorer and running the .exe or by selecting from the 'Build' menu the option 'Execute exename.exe' (e.g., 'Execute vesper.exe').
It is of course a good idea to test your executable before you deploy it to your users, to ensure that all works as expected.
Suggestion: If you run your executable in the same folder that your source code is in and you have made changes to some of the source that is not built (bound) into the executable, due to the nature of dBASE PLUS, it will try to act as a DEO application, and it will attempt to use the newer version (if it was compiled to object code). If you do not wish your application to act as a DEO application at all, add a line in the startup code for the main program that looks like:
_app.allowDEOExeOverride := false
This will tell the runtime engine to reverse the order that is normally used when looking for object files. (For more information on this, see the explanation of DEO and allowDEOExeOverride in the dBASE help.)
If you wish your application to be a DEO application you may want to jump down to Creating a DEO Application.
Done?
If all you wanted to do was build your executable, then you should be
done. If you are interested in other options, keep reading ...
Starting a New Project
Starting a new project is quite easy with the new Project Explorer. Just like other design tools in dBASE, in the Navigator you will find an option "(Untitled)". If you double-click this the Project Explorer will open with a brand new and completely empty Project.
New Project - 'Untitled'
Project
This is an important page of the project, as it defines a variety of things
that are important for how your application is built, and so on.
- Project Name: This is just an internal name that you can use
for your project. While not directly used by anything else in the Project
Manager, this will be the default name of your executable. In
other words, if you type "MyApplication" in this entryfield when you
move focus off this entryfield you will see "MyApplication.exe" in the
"Target EXE Filename:" entryfield.
- DEO Application? This is used if you want your complete application
to be a Dynamic External Object based application. For more details
on this concept see the appropriate section of this paper, and also
see DEO in the online help for dBASE PLUS. NOTE: If you only want some
of your files to be treated as DEO, do NOT use this checkbox. (It is
possible to create what might be called a "hybrid" application, partially
DEO and partially not ...)
- Web Application? This tells the Project Explorer, when you
build it the executable to add the "WEB" option. This option tells the
dBASE Runtime to not load the elements used for user-interface (such
as forms, and so on), which speeds up loading the runtime. Do not check
this unless you are creating a web application, or are very sure you
have absolutely no user-interface elements in your application.
- Main Program File: This is not really optional. However, it
can be set either here after you have added files to the project (see
below), or when adding files and setting it there. This is the file
that is initially run when your application starts up -- such as "Start.prg"
or whatever.
- Main Program Parameters: This is only used if you are requiring
parameters for startup of the application.
- Target EXE Filename: This is the name of the executable that
is created when you select 'Build'.
- Splash Bitmap: The name of the bitmap to be used for the splash
screen of your application. Note that the file must be in the project
file list.
- Program Icon: The name of the icon file to be used for the
titlebar of your application. Note that the file must be in the project
file list.
- Log Filename: This is a text file (default extension of .txt).
This gets written to while the application is being built (or re-built)
using the "Build" menu options. Any errors or warnings will be displayed
here. It is a good idea to use this.
- Status: Shows the last date/time the file was created or modified.
- Author: What it sounds like. The author(s) of the program.
- Description: Describe the program.
File Details
This option is only allowable if a file is selected in the listing on
the left of the screen. Since the project shown above is empty, you would
not be able to select this item. This will be discussed below under "Adding
Files to The Project".
Log
When you select the option(s) to build or rebuild the executable from
the 'Build' menu, a log file is used to store errors and/or warnings that
are generated in the process. This is displayed on this page of the form.
DEO -- this is where you specify the folders used for a DEO application. We will discuss this in more depth under the section of this paper titled: "Creating a DEO Application".
Adding Files to The Project
There are several ways to add files to the Project:
- Right click on the treeView (list of folders) on the left part of the screen, and select "Add files to Project";
- Drag files from the dBASE Navigator to the Project;
- Select files in the Windows Explorer and drag them to the Project.
For each file you add to the project there are some questions you need to examine, many of which are defined on the "File Details" page of this form. These will be discussed in the two sections below.
Creating a 'Basic' (Non-DEO) Application
As noted earlier in this document we'll use the Vesper application to show how this works.
A 'basic' dBASE application is a snap to do with the Project Explorer, once you have all your files loaded. So the first thing to do is to add the files that you need into the project. For this demonstration a project will be created from scratch, all the files added, and any specific settings done.
The first thing to do is to start the Project Explorer. The simplest way is to go to the "Project" tab of the Navigator in dBASE PLUS, and double-click on "(Untitled)".
This will bring up this screen:
New Project - 'Untitled'
Getting Started
Once you have this there are a few things you should do:
Enter a "Project Name:". In this case, since this is the 'Vesper' application, I will enter "Vesper".
Just going down the "Project" tab items, you would need to know various things, such as "Is this a DEO Application?", in this case it is not, so leave that unchecked. It is not a "Web Application", so leave that unchecked. "Main Program File" -- I haven't added any files to the project yet so I will leave that alone. I am not passing any parameters to the executable when it is run, so I am leaving that alone. Note that the "Target EXE Filename" is filled in as "Vesper.exe". That's actually perfect for my needs, but you can change this if you wish. The "Splash Bitmap" and "Program Icon" entries cannot be worked with until those files are added to the Project, so I will come back to them. The "Log Filename" is a useful thing to have, so that the Project Explorer can display any warnings or errors that occur when building the application. I will call this "VesperLog.txt". For the 'Author' I will use my name, and then the description can be long or short, I don't need a long description ...
At this point it is a good idea to save the project. So clicking the 'Save' button, or pressing Ctrl+S, and I am naming this "Vesper".
The Project should look like the following at this point:
The 'Vesper' Project -- with no files
Add Files
The next step is to add the files to the Project that need to be there.
Determining what needs to be in the Project is not always easy. One option
is to simply add everything. Anything that the PE doesn't know what to
do with will end up in the 'Other' section. However, the Project Explorer
is not the deployer, and so it's probably not necessary to place all
the files you need into the Project.
There are a couple of ways to add files, one is just to grab everything you want in the Project and add it at once, the other is a bit more orderly. It's completely up to you.
Note that adding files you have several ways to do so:
- Drag each file individually to the Project Explorer from the Navigator in dBASE. This can be time consuming, but it does work. This may be more useful to grab files you forgot to add at an earlier point in the process.
- Using the Windows Explorer you can drag files to the Project Explorer, and you can do that by selecting lots of files, or individual files.
- Right click on the list of folders on the left of the Project Explorer, and select the 'Add Files' option.
I am going to use the last option as it is built in to the Project Explorer, and works well.
If you right-click on the main folder that says "Project Files", you will see only two options enabled: "New" or "Add files to Project". The "New" option allows you to go to the appropriate design surface and create a new file of the type selected. This will then be added to the Project. We're going to assume for now that all the files we need have already been created.
You can also go to individual folders and right click on them, and see the same thing. However, if you select, for example: "Form", and right click, and then select "Add files to Project", you will be limited to only adding forms (.wfm), custom forms (.cfm), compiled forms (.wfo) or compiled custom forms (.cfo), or you can select the 'All' option, which will list all files in the folder. You will see similar selection options for each of the other folders. The current release of the Project Explorer is missing an option for menu files (.mnu) and popup files (.pop). This will likely be fixed in a future release.
For the purpose of this demonstration, the files will be added for each folder (forms, reports, etc.) one folder at a time. This is really just a preference issue on my part. Use what works for you.
Make sure when you add, for example, forms, that you check to be sure that you get any Custom forms you might need to add. Also remember that Menu and Popup files do not (currently) have the option to be selected, so you may want to use the 'All' option under 'Forms', and select your .mnu and .pop files.
One other thing to note, if you use files that are in other folders, you will have to navigate to them. While dBASE, Inc., intends to add the ability to use Source Aliases in the future, this is not currently an option.
If you are adding the Source Code for a file, you do NOT need to add the compiled object for that file. If you add tables to a project, you do not need to add the auxiliary files (for DBFs, the .MDX and/or .DBT files; for Paradox (.DB) tables, all the various extensions that may be needed for a table), just the table itself. The only reason to add a dBASE object file is if you do not have, or do not wish to use, the source code for that file.
As files are added to the project, you will see that the last file added will appear with the 'File Details' tab on the project showing, and on that page of the Project, the 'Details' tab will be set. This allows you to modify how the file is dealt with by the Project. We are going to use the default options for now ...
Note that your custom class (.CC) files should be added to the 'Other' folder in the Project Explorer.
When adding files, don't forget the items that are in other libraries as noted above. For example, Vesper uses a number of files from the dUFLP code library, and it uses Seeker.cc and Report.cc, which are provided by dBASE, Inc. You may want to go through your source and check for references to code in other libraries. You should also check the source files for the files you have gotten from the different libraries, as some of them may have dependencies that are not obvious (for example: :dUFLP:ini.cc depends on code in :dUFLP:StringEx.cc and :dUFLP:SetProc.prg).
Once you have added all the files you should see something like the following (with of course your own files for your own project):
The 'Vesper' Project -- with files added
Start Program
There needs to be one program that is loaded when you start the application.
This is called the "Main (Startup Program)". You should find this and
click on it in the treeview listing on the left of the screen. In the
case of the Vesper application this is called "Start.prg".
If you click on that file, you can set this as the "Main" program by either checking the checkbox that says "File is Main (Startup) Program?", or by right clicking and selecting "Set as Main". This should now look like:
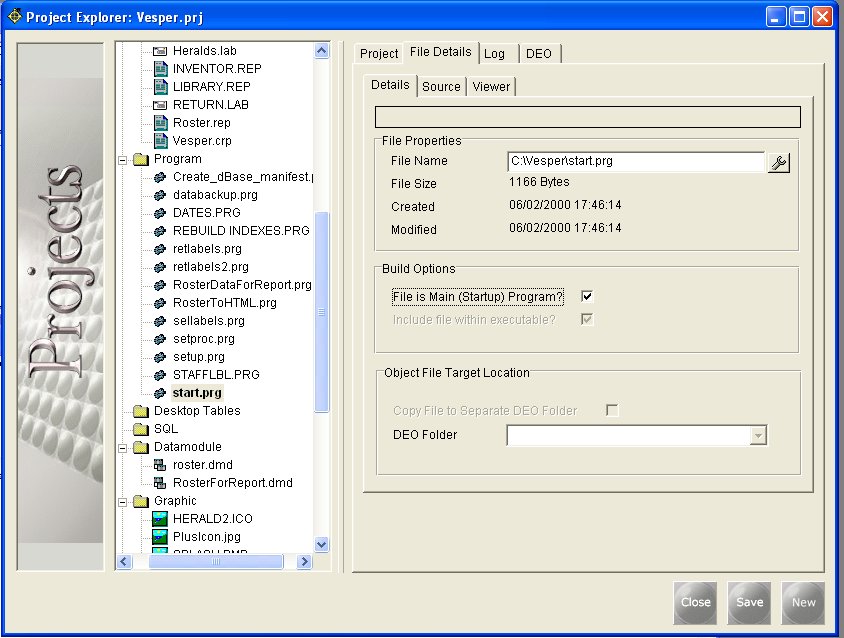
The 'Vesper' Project -- with Main/Startup program selected.
Note that the startup program is shown in bold in the treeview listing. Your startup program does not have to be a .prg file -- it can be a form, a report, whatever you need. Most developers use a .prg as it allows a lot of non-UI code to be handled in the background. It all depends on your needs.
Finishing Touches
At this point all the files needed for the application should be
loaded into the Project, and all the settings should be made. There is
no need to do much more, but there are some minor finishing touches you
might want to consider.
If you go back to the "Project" tab of the project you can set the last properties needed. Note that since we have set the start program, the combobox for "Main Program File:" is now filled in for us.
If you want a splash screen to appear when your application loads you will need to select that from the images that are in the project. If you did not load any images, you should add the image you wish as your Splash bitmap (these must be .BMP files, to the best of my knowledge ...). You will want to do the same for the "Program Icon" and again the icon file (.ICO) needs to be included in the project.
This should now look like:
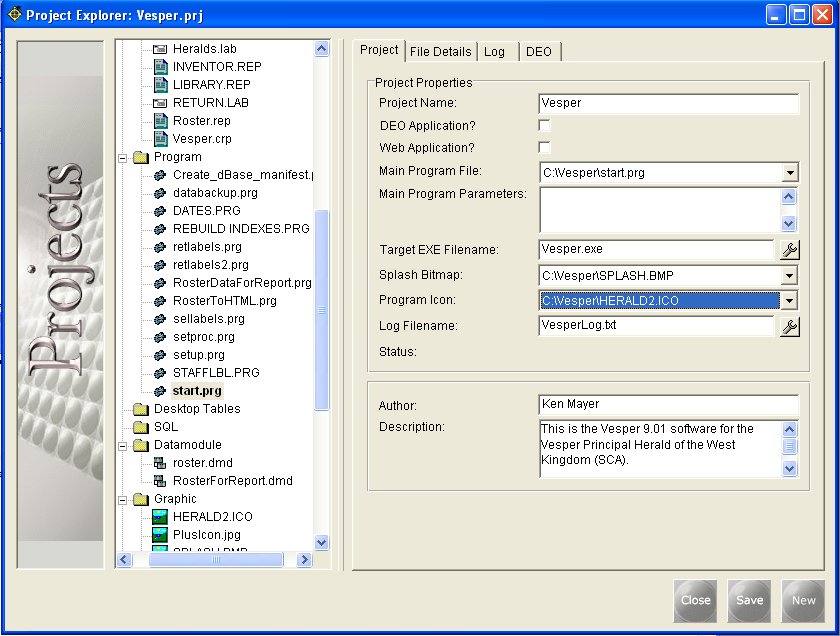
The 'Vesper' Project -- with options set.
Now What?
At this point the Project is "ready to go". You can look at files, the
source code, for example, in the 'File Details' part of the project. You
can add files, remove them if you realize you don't need them in your
project, and more. You can go to the appropriate design surface by right
clicking on any individual file and modify the file if you need to. This
is a handy place to get your application ready to roll, but it is also
a handy place (and some developers may prefer this) to work from, meaning
that you can modify and update the application directly from the Project
Explorer.
Compiling and Building the Application
Ultimately, of course, the goal is to compile the application and get
it ready to deploy for your customers or users.
Once you have the options set this should be as simple as using the 'Build' menu and selecting either 'Build' or 'Rebuild All'.
The differences between 'Build' and 'Rebuild All' were noted earlier in this document, but to summarize: 'Build' assumes that all of your object files exist; 'Rebuild All' will recompile all your source and then build the executable.
I prefer to just use 'Rebuild All' as this will recompile all the source code in my application and then build the executable. Your mileage may vary, you should experiment to find what works best for you.
Once the application is built you should see the contents of the log file, which includes warnings and errors that occur while compiling and building the executable. This is useful if something doesn't work properly, or if you get an error that says that the executable was not built. If you view the log, you can pin things down faster in most cases than if you just experiment.
When you are done compiling and building your executable, if successful, after you acknowledge a message that says the executable was built, you should see something like:
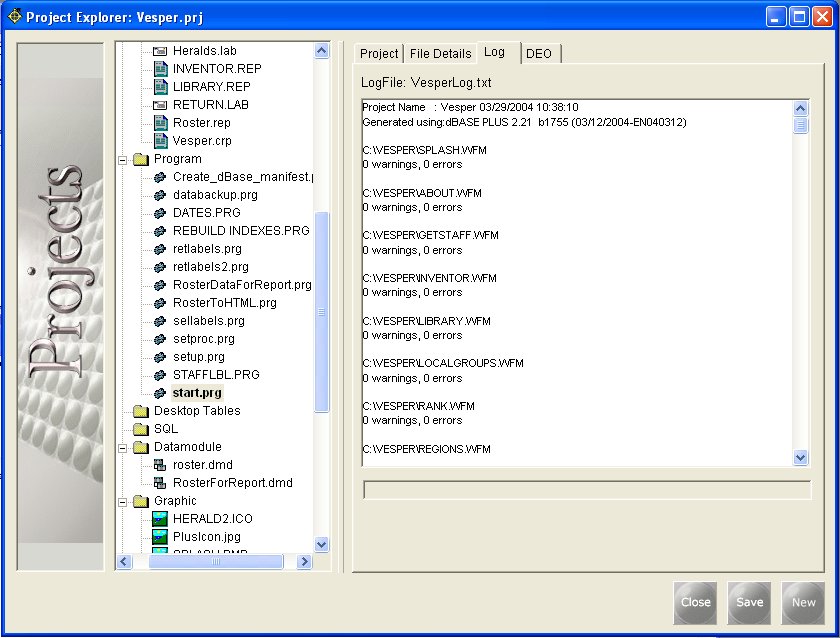
The 'Vesper' Project -- after Compile/Build -- the Log
You can scroll down through the log and see any warnings that may have occured, and if the build failed, you can see any errors that might have occurred as well.
Creating a DEO Application
Creating an application that relies on Dynamic External Objects is pretty easy to do using the new Project Explorer, this is something that the original PE could not deal with at all.
If you do not know what DEO is all about, please see the online help (select the 'Help' menu from inside dBASE, and select 'Contents and Index', then select the 'Index' tab. Type DEO in the entryfield at the top ... then select the DISPLAY button ...).
The following information assumes that you have a project that has the files that you wish to use for your application already loaded (see the previous section, or even the very beginning ...).
Once you have all the files set up for your application you can make the application a DEO application in a few steps. For this example, we'll assume the Vesper application as it was seen just before selecting the option to Build the executable.
The 'Vesper' Project -- with options set.
Note that for the rest of this section of this paper, I have changed the name of the project, and saved it as "VesperDEO.prj".
If you wish to change this application to a DEO application the first thing you will want to do is to check the "DEO Application?" checkbox. When you do, you will see this dialog. Click 'Yes' if you really wish to change this to a DEO application.
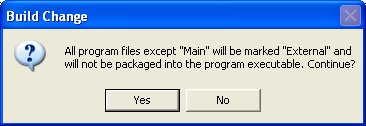
The Message asking if you want to do this ...
Once you do that, if you click on the first file in the tree, you should see something like:

The 'Vesper' Project -- Set to a DEO Application, the first file
The question now becomes "How do you tell the PE where to place the object files for my DEO application?".
It will take some time as you have to set the information for each file in the application, but it's pretty simple.
DEO Folders
The first thing to do is decide what folders will be used, and what the
path is. This is what the 'DEO' tab on the main part of the form is all
about.
Select that tab, which should appear as:
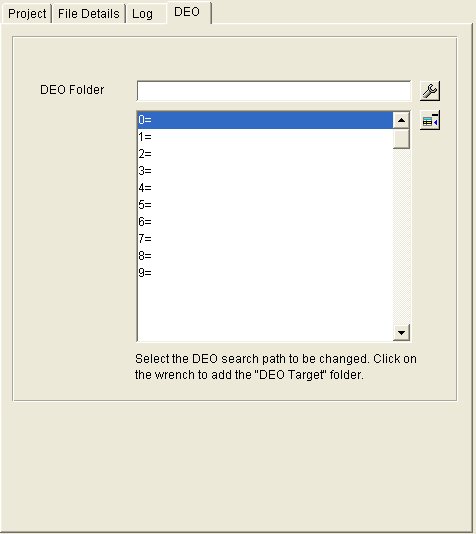
The 'Vesper' Project -- The DEO Tab
If you have existing folders that you wish to use for your DEO deployment, you can select them by clicking on the 'tool' button. This will bring up a standard dBASE dialog allowing you to select a folder.
If you wish to create new folders type the full path into the entryfield and press the ENTER key. The Project Explorer will create the folder.
With Vesper I might want three folders -- one for Vesper specific files, one for files from the dUFLP, and a third for files from the Core Product (seeker, etc.).
For this example I will preface each folder with 'DEO', but that is not necessary -- you can call them whatever you wish.
To create the first folder:
- Select the item in the list you wish to modify, for example "0=" in the listbox.
- Click on the "DEO Folder" entryfield.
- Type the folder path. If you do not give a path, it will be placed under the current working folder. For example, this application is being created under C:\Vesper. If I simply typed "DEOVesper", the path would be C:\Vesper\DEOVesper. This may be what you want, it may not be. If you want the folder off the main drive, you would need to type: C:\DEOVesper instead. If you want the folder to be on a network drive, you will need to use that ...
- You will be asked if you want to create the folder. Select 'Yes' if you do.
Basically you would repeat this for each folder you wish to add, selecting the item in the listbox you wish to change first. If you add a second folder, then select "1=" (the second item in the list), when you add a third folder, select "2=", etc.
You can remove an item from the list if you decide you don't want it by clicking on it and selecting the '-' button on the right.
Once done selecting the folders you wish to use you should see something like:
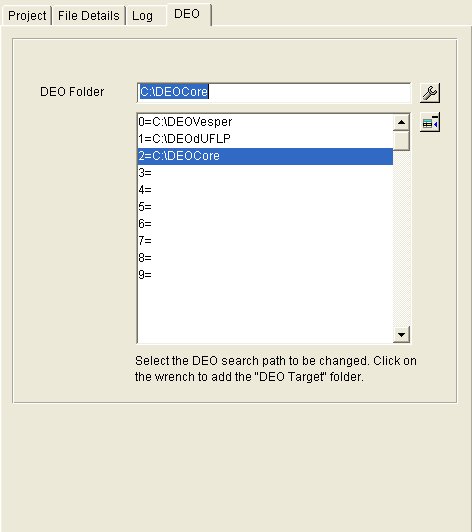
The 'Vesper' Project -- The DEO Tab -- Folders Selected
Selecting the DEO Folder For Each File
You have set up the folders you wish to use. Now you need to tell the
Project Explorer where to place each of the files.
Select the first file in the treeview and look at the 'Details' tab (if not selected, click on 'File Details', and then 'Details').
The 'Vesper' Project -- The File Details
Note that the checkbox "Include file within executable?" is unchecked. This is correct if you're creating a DEO application. Next you need to check the checkbox that says: "Copy File to Separate DEO Folder". When you do that, the "DEO Folder" combobox is now available to you, and you can select what folder to copy the object file to.
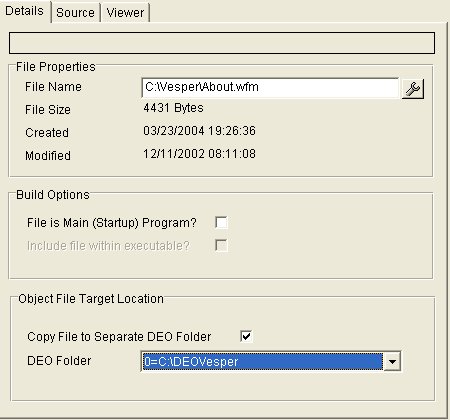
The 'Vesper' Project -- File Selected for DEO Location
You have to do this for each file that can be compiled. There are files you do not really need to worry about for the application. See the DEO explanation in the help file for more details.
You may (should) notice when you get to the program you have marked as startup, the Project Explorer will not allow you to set the DEO Location. This is proper behavior. The application must have that file compiled and built into the executable itself.
The Application's INI File
There is one more thing that you will want to do. This is explained in
the online help under the DEO topic, it has to do with specific entries
in the application's INI file.
There is more on this topic regarding other issues you may want to check out, the following is speficially about the DEO part of the .ini file.
Even if you do not create one, your application will create a .INI file to store some basic settings it needs. You should create one, so you have control, and in this case, so you can tell it where to find the files it needs.
A .ini file will be of the same name of the executable, but with a .INI extension. In this example "VesperDEO.exe" would need a "VesperDEO.ini". Using the three folders noted above, the .ini file should have the following entries in it:
   [ObjectPath]
   objPath0=c:\DEOVesper
   objPath1=c:\DEOdUFLP
   objPath2=c:\DEOCore
You could, of course, add the .ini file to the project, but it doesn't need to be there.
Compile and Build The Application
The last step is to actually compile and build the executable. You need
to use the 'Build' menu, and the 'Rebuild All' option. Why this option
instead of 'Build?' Because among other things, 'Rebuild All' will copy
the object files to the appropriate DEO folders as specified in the Project.
If you choose to do this, then you will (unless there are errors) get
a dialog telling you that the application has been built, and then the
Log file page of the project will come up. When it does, it will show
something like:
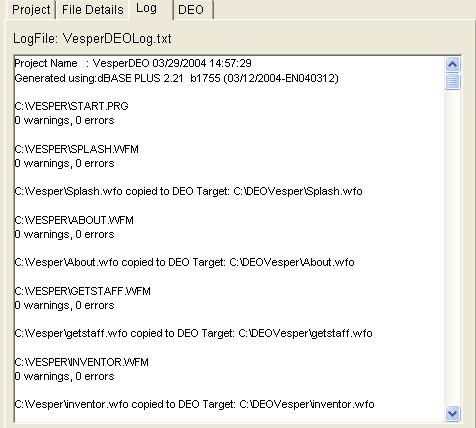
The 'Vesper' Project -- Log File
For each file you specified a DEO folder the log shows you that the Project Explorer copied the object to that location.
At this point you should probably test the application. Make sure if/when you copy the .exe file that you also copy the .ini file. For my purposes, I am testing this version of Vesper by creating a folder at C:\VesperDEOTest and copying those two files to it ... sure enough, it works. (Okay, I know you can't see it, but ...)
DEO AND NON-DEO?
One thing you might want to do is make part of the application DEO, and
the rest of it 'not DEO'. What this means is that you could opt to have
more than just the startup program in the executable, and only some of
the files be done as DEO. To do that, simply uncheck the "DEO Application"
checkbox, and then for individual files either select the "Include file
within executable?" checkbox or the "Copy File to Separate DEO Folder"
checkbox (and don't forget to select the appropriate DEO folder). When
you chose the "Build" menu, then use "Rebuild All": the DEO files will
be copied to the appropriate location(s), and the others will be compiled
and built into the executable.
BDE Settings
With dBASE PLUS and later versions, a runtime installer was included to help you out, which installs the runtime and the BDE ...
Details on this will be found in the the appropriate document on deploying the application. (We recommend Inno Setup which is free, and which we give you on the product CD, or you can get it directly from the Inno Setup developer -- see the documents in the Knowledgebase on this.)
.INI Files
There are often a few settings saved into the .INI file for dBASE that most people don't even think about. This may include things like the SET CENTURY setting, which will affect the display of date fields (if set to ON you will see all four digits of the year, if set to OFF, you will see only two digits ...).
Note that INI files are covered in more detail in another Knowledgebase article ...
If you expect your deployed application to perform in the same manner as when you were developing it, you MUST deploy a .INI file. It needs to be the same name as the .EXE -- otherwise your application will not automatically read these settings (i.e., MYEXEC.EXE would require a .INI named MYEXEC.INI).
Some settings you should consider (see online help in dBASE for details for SET EPOCH, SET CENTURY, SET LDCHECK, etc.) adding as an example below:
   [CommandSettings]
   EPOCH=1950
   LDRIVER=WINDOWS

   [OnOffCommandSettings]
   CENTURY=ON
   LDCHECK=OFF
   BELL=OFF
   TALK=OFF

   [CommandWindow]
   Open=1
   Maximized=0
   Minimized=1

   [ComponentTypes]
   ComponentTypeNumeric=1
   ComponentTypeDate=1
   ComponentTypeLogical=0
   ComponentTypeMemo=0
   ComponentTypeBinary=0
   ComponentTypeOLE=0
   ComponentTypeNumericForTables=1
   ComponentTypeDateForTables=1
   ComponentTypeLogicalForTables=0
   ComponentTypeMemoForTables=0
   ComponentTypeBinaryForTables=0
   ComponentTypeOLEForTables=0

   [Grid]
   DefaultMemoEditor=0

   [Toolbars]
   Format=0

   [ObjectPath]
   objPath0=c:\path
   ...
   objPath9=c:\anotherpath

   [IDAPI]
   CONFIGFILE01=mycustom.cfg
The "LDRIVER=WINDOWS" setting ensures that no matter what your application's BDE Driver your source code will be saved as ANSI. (There is a problem with this setting and the SoundEx() function -- otherwise this setting will enhance the speed of text processing immensely).
The "TALK" setting is very important (this is from Gary White who discovered it during one deploy he did) -- if Talk is not set OFF (either here or in your code), there will be a serious performance degradation, as dBASE will go through the motions of echoing comands to the command window. In dBASE PLUS this isn't as important, as the Runtime Engine automatically assumes talk is off.
The "CommandWindow" settings are there just to be sure there are no other problems -- having the runtime try to open the Command Window is probably not a good idea.
The "ComponentTypes" section may cause some datatype mismatch errors if not included, particularly if you are using the grid component on your forms. You should copy the section shown above from your own DB2K or PLUS.INI, as you may have different settings than those shown above.
"Grid" is new to dBASE PLUS version 2.21, and is used to set the default columnEditor type for memo fields in a grid. If DefaultMemoEditor is set to zero, the default (columnEditor) is used, if set to one (1), the columnEntryfield (the original way the grid handled memos).
"Toolbars" -- there's one entry that should be checked out, and that's the "format" option. If it is set to "1", the format palette appears when a form opens that has an editor control; if it is set to "0", the format palette does not appear.
"ObjectPath" -- this is how DEO is handled. See the discussion on this in the DEO Application section of this document, and in the online help. Briefly, when you run an executable built with dBASE:
- It looks in the "home" folder from which the application was launched.
- It looks in the .ini file to see if there's a series of search paths specified. It checks all the paths in the list looking for the object file requested by the application.
- It looks inside the application's .exe file, the way Visual dBASE did in the past.
"Idapi" -- is only really necessary if you are using a custom configuration file for the BDE. (Note, this is not really a good idea if it is possible multiple programs on the same computer may want to use the BDE with different configuration files. The way the BDE works this actually will cause problems. It is recommended that you, instead, use other methods of modifying the BDE's setup, possibly including running some code in the dBASE Users' Function Library (dUFLP) that will modify registry settings used by the BDE.)
Encrypted Tables
If you are working with encrypted tables (using the dBASE PROTECT command
to do so), you will need to deploy the DBSYSTEM.DB file, but you also
need to have an entry in your .INI that looks like:
   [CommandSettings]
   DBSYSTEM=D:\PATH
Where "D:\PATH" is the path to the directory where you are deploying this file to. If you already have a "[CommandSettings]" section (see above), just add the "DBSYSTEM" entry. If you are deploying the DBSYSTEM file to the same as your application you can set this to "." (i.e., DBSYSTEM=. ) -- the "." stands for "current directory" ...
OCX and DLL Controls
OCX and some DLL Controls require some registry settings. The problem is that it's not 100% automatic in most cases. Below are two ways of dealing with these -- you can let your install software handle this, or you can code it in your own application.If you wish to use the installer to handle this, since each install software package is different, either read the appropriate document (this is dicussed in the Knowledgebase article that walks through creating an installation with InstallShield), or the help that comes with that software.
Manually Handling These In Your Own Code
An example of this is in VESPER7 (found at the author's web site (http://www.goldenstag.net/dbase)). This is free-ware sample code.
The basics of this are covered here.
dBASE ships with some registry API calls found in these files -- WINREG.H and REGISTRY.PRG. (WINREG.H is in the INCLUDE directory that ships with dBASE, and REGISTRY.PRG is in the SAMPLES directory ... don't ask me why they were placed in these different directories, but ...)
The file "winreg.h" contains definitions, and "registry.prg" contains actual extern calls to code.
The fun part is that you need to check to see if the registry key is set. In the startup program for VESPER7, the following is contained in the Open method (for a calendar control created in Delphi 3 and converted to an OCX file):
      // necessary for Registry stuff:
      #include <winreg.h>
      set procedure to registry additive

      // Check to see if the Calendar has been registered
      // and if not, register it
      oReg = new Registry( HKEY_CLASSES_ROOT, ;
                           "CalendarXControl.CalendarX" )
      // if key referred to by "oReg" does was just
      // created, then we need to register the control:
      if ( oReg.newlyCreated )
         run( "regsvr32 /s calendar.ocx", false )
      endif

      // check to see if the registry key is empty -- if
      // so, something didn't work ...:
      if empty( oReg.queryValue( "" ) )
         msgbox( "Registry setting for Calendar control not set --"+;
                 "Do not try running calendar -- an error will "+;
                 "occur and may cause the program to crash. Contact "+;
                 "Ken to get a fix ...", ;
                 "Didn't work!" )
      endif
If the registry key is empty, it was probably created when we checked to see (oReg.newlyCreated) if it existed. The registry API calls being used will create the key when checking for it. If it didn't exist (i.e., oReg.newlyCreated actually returns a logical value -- true means we just created it), then we run a DOS program (odd, but true) -- the /s parameter simply runs the program in "silent" mode -- no dialog box will appear -- that will register the ocx ( "regsvr32.exe" -- note -- this program normally resides in your \WINDOWS\SYSTEM directory -- if it doesn't, or if your DOS path does not include that directory, this will not execute). (Note: there is now a DeleteKey() method in the REGISTRY object -- this didn't used to be there -- at the time this version of Vesper was actively being worked on Visual dBASE 7.0 was the latest version -- this was added for 7.01 ... you could delete a registry key if it was empty ...)
The last thing we do is check to see if the key is still empty, and if it is, we display an error. This error is usually because the program doesn't exist (not likely, but it is possible -- "regsvr32.exe" is installed with Windows 95, 98 and NT); or more likely is the fact that your DOS path does not include the \WINDOWS\SYSTEM directory, which is where this program is installed to. You can get the user to step out to DOS and type:
regsvr32 myocx.ocx
and it should display a (windows) alert dialog stating that it worked. (The /s flag in the RUN() call above simply runs this in "silent" mode -- so that when the start program executes, the user never has to even be concerned with the details ...)
NOTE: Using REGSVR32.EXE you can actually remove an OCX's (or probably even a .DLL's) entries in the registry by using the /U flag (uninstall).
If your .OCX has dependencies on other .DLLs, you need to install them first -- otherwise the .OCX won't install properly.
Network Deployment
This information comes from Gary White, who has performed a network installation. The author of this HOW TO does not currently have a way to test this. If you have suggestions for network deployment that are different from Gary's, please feel free to say something in the dBASE newsgroups ...
"Network deployment is a two step process. You must install the program and you must install the data files. I have not found a way to do this with a single deployment. I build one deployment that does not include any shared tables. The tables that will reside on a shared network drive are a separate deployment project. The data files project may, or may not include setting up the BDE alias. The start-up program checks for the existence of the BDE alias, if it is not found, allows the user to locate the files. Once the files are found, the program creates the alias on the users' machine. A simplified version of the code for that would look something like the following, although a more complete version would check for the existence of all the files necessary." (Author's note: some of the code below is now incorporated into the :dUFLP:BDEAlias.cc class)
   //Code as provided by Gary White, some of it is
   // based on code by Romain Strieff and Jim Sare
   if not databaseFound( "yourDatabaseName" )
      cPath = getDirectory()
      CreateAlias( "yourDatabaseName", cPath )
   endif

   function dataBaseFound( cDatabase )
      local d, dbArray
      d = new database()
      dbArray = d.getSchema( "Databases" )
      release object d
   return dbArray.scan( cDatabase ) > 0

  function CreateAlias(cAliasName,cPath)
     //Creates a DBF Alias

     if type("DbiAddAlias") # "FP"
        extern cint DbiAddAlias(;
               cHandle,;
               CPTR,;
               CPTR,;
               CPTR,;
               clogical) idapi32
     endif
  return DbiAddAlias(null,;
                     DBCSToSBCSZ(cAliasName),;
                     DBCSToSBCSZ("DBASE"),;
                     DBCSToSBCSZ("PATH:" + cPath),;
                     TRUE)=0

   // necessary for above
   Function DBCSToSBCSZ(c)
      LOCAL cTemp, x

      cTemp = Replicate(Chr(0), ((Len(c) + 1) / 2) + ;
                                ((Len(c) + 1) % 2))
      For x = 1 To Len(c)
         cTemp.SetByte(x - 1, Asc(SubStr(c, x)))
      EndFor

   RETURN cTemp
That's it
Well, parts of this could be covered in more depth, but the idea was to give you a basic grounding in using the Compiler options with dBASE. If you need more, check online help for both dBASE (Project Explorer, BUILD ...); and your deployer software. In addition, you are encouraged to visit the dBASE newsgroups (see www.dbase.com for details) to obtain assistance.
Don't forget that the Knowledgebase is full of other useful documents as well as this one ...
DISCLAIMER: the author is an employee of dBASE, Inc., but has written this on his own time. If you have questions regarding this .HOW document, or about dBASE PLUS you can communicate directly with the author and dBVIPS in the appropriate newsgroups on the internet.
.HOW files are created as a free service by members of dBVIPS and dBASE, Inc. employees to help users learn to use dBASE more effectively. They are edited by both dBVIPS members and dBASE, Inc. Technical Support (to ensure quality). This .HOW file MAY NOT BE POSTED ELSEWHERE without the explicit permission of the author, who retains all rights to the document.
Copyright © 2004, Kenneth J. Mayer. All rights reserved.
Information about dBASE Inc. can be found at:
http://www.dbase.com
EoHT: PrepareToDeploy.htm -- March, 2004 -- KJM