Introduction
Sometimes creating new ideas in Visual dBASE is not really new but just a new way of looking at something. You then say, why didnt I think of that? Well, thats why this magazine exists, to share ideas with each other. And then those ideas could spark off new ideas in other areas that you might find useful.
The splash screen is the entry point into your application. Depending on which way you look at it, it could be a case of The first impression is always the best impression, or it could be a source of frustration. Either way you as the programmer could go 50/50 and allow some kind of user preferences. That is why I always create my own splash screens using VdB forms. This gives me more flexibility on what I can do.
Seemingly, animation, to some degree, has always been difficult in Visual dBASE. But then again what is animation? Well, in its simplest form, its just a series of still pictures that differ slightly in position or image. When strung together and viewed at high speed, that creates the effect of animation or movement. Well, keeping this in mind, we can create a simple but effective animation in Visual dBASE.
The Form
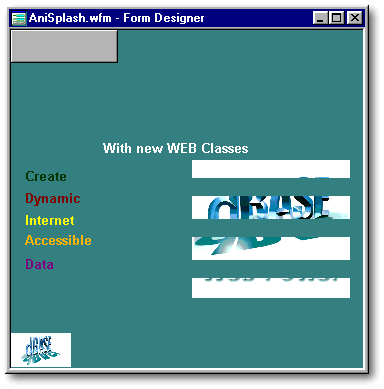
First we need to create a form, and put some objects on it. It does not matter which objects; that depends on the effect that you would like to present. Also, placing them on the form in a set position is not an issue, because the nature of animation is movement and we will be moving the objects. I have put onto the form some pushbuttons, text, and image objects. The Form Designer then would look like this.
The images are from dBASE Inc. So, they would carry any copyright attached to them. So, if you think you are infringing on copyright laws, please replace those images with any of your own. Besides, if you are going to deploy your splash screen to a client, you want your own image instead (which makes sense). So these images are just for demonstration purposes only. The spaces in between the larger image are created by placing text objects with their transparent property set to true over the image. All objects are set to invisible at runtime, in other words visible = false. We will make them visible as and when we need them. The sample application provided with this article has these properties: the form is not MDI and the clientEdge = true, topMost = true, autoCenter = true, smallTitle = true, and sysMenu = false. The other properties of the form can be set to your needs. In fact, any property can be set to your needs. Ive just done it this way.
Since we are doing a lot of movement,
we want to make sure that the screen updates correctly. Therefore, I created
a function in the form called repaint, which you can find in the dUFLP
(a library of resources published by Ken Mayer). I will show the
routine for reference:
|
Function Repaint /* This is a routine by Jim Sare with minor modifications by Ken Mayer. It can be used to ensure that if any processing has occurred that the form gets repainted (which sometimes doesn't happen) ... */ parameter oForm if type( "oForm" ) == "U" or empty( oForm ) oForm = form endif if type( "UpdateWindow" ) # "FP" extern CLOGICAL UpdateWindow( CHANDLE ) USER32 endif RETURN UpdateWindow( oForm.hWnd ) |
|
Every time we want to update the
screen or the form, we call its repaint method and then the screen is updated,
adding to the effect of smooth animation.
|
Form.repaint() |
|
The Animation
As mentioned before, animation is just a set of still images arranged in a certain order and then displayed in the same or some other order at a fast rate to create the illusion of movement. No different with Visual dBASE. All objects on the form follow the same principle, although the parameters might change. We will do through the first object, namely the pushbutton, then you need to examine the code to figure out the rest. You might even think of a better, more effective way of doing things. Like I said, if you do, share and share alike.
I have put the code in the form's onOpen() event so that the animation runs immediately. You might do it another way according to your needs. First of all, we turn off the shell. Make the object visible. Then we use a for next loop to create the animation. Changing the properties of the object as we loop through the code, remembering to repaint the screen to finish our animation
Note: Keep in mind that
the system of measurement that I am using is characters, as opposed to
twips, inches, or pixels. This property is set in the form,
either through code or at design time in the inspector. I have not
tested it under the other measurement types. If your default is different,
you might have to change the code slightly to incorporate those measurements.
For example, using twips the movement would seem a lot slower than actually
using chars. This is because one character measurement on your screen
is equal to many twips. This form is also designed on a Windows 98
machine.
|
for i = 1 to (this.height - form.pushbutton1.height) step (1/100) // we use a fraction to get smoother animation and control speed this.pushbutton1.left = i this.pushbutton1.top = i sleep .1 // adjust this for speed to work on different computers next i this.pushbutton1.top = this.pushbutton1.top - .3 |
|
See the online help for more information on the for next loop.
I dont know why, but moving the pushbutton down in this fashion does not need the form to be repainted in order to achieve animation. But the others objects do. You need to experiment to see what works best for you, or what you can tolerate.
We now use another
for
next loop to grow
the pushbutton, this creates an effect of horizontal movement.
|
for i = this.pushbutton1.width to this.width*10 if this.pushbutton1.left>1 // .or. this.pushbutton1.width<=this.width this.pushbutton1.left=this.pushbutton1.left-i/10 this.pushbutton1.width=this.pushbutton1.width +(i/10)*2.5 else exit endif sleep .01 // control execution speed. seems anything above .01 seems // to give a undesired visual effect at the end of the box // as result of moving and resizing this.repaint() // we need to repaint the screen to update the // movement of the controls next i |
|
Notice we use the repaint here. Also we use the sleep to control speed of execution. Play around with that to see what is the best output for your particular system.
The next effect is that of the
text being typed out on the pushbutton. We achieve this by just changing
the text property of the pushbutton and adding to the text as we go along.
|
form.pushbutton1.text="V" // add some sound effects play sound filename "whip.wav" sleep .1 form.pushbutton1.text="Vi" play sound filename "whip.wav" sleep .1 form.pushbutton1.text="Vis" play sound filename "whip.wav" sleep .1 form.pushbutton1.text="Visu" play sound filename "whip.wav" sleep .1 form.pushbutton1.text="Visua" play sound filename "whip.wav" sleep .1 form.pushbutton1.text="Visual" play sound filename "whip.wav" sleep .1 form.pushbutton1.text="Visual " play sound filename "whip.wav" sleep .1 form.pushbutton1.text="Visual d" play sound filename "whip.wav" sleep .1 form.pushbutton1.text="Visual dB" .. |
|
We have also added some sound to create a multimedia effect. This sounds great, isn't it? However, If you don't like them, you can always use your own.
Conclusion
Well, it's that simple. Apply similar or different effects to the other objects, create your own, or use other objects and voilà you have Shockwave for Visual dBASE. Neat huh! Remember this might not be for everyone, but it just gives you an idea of what you can do with Visual dBASE.
To download the Animated
Splash Screen Form, click here
(it's a 45Kb zipped file)