The advantages of using this class are what you might expect with any hand-coding approach — near-total flexibility of placement of data on the page, reports that are composed of virtually any combination of sections, related or not, and the ability to use your already-open queries/tables. Any table circumstances which occur in a form can be used as-is in a Vic report. There are extra goodies as well, the most spectacular of which is a zoomable preview which allows rapid bouncing from the first to the last page of any size report. There is also a wonderful function for printing an onscreen form, and the means to print graphic images. Finally, access is provided to most of the Windows shapes, pens, and brushes. Who knows, perhaps a customer will want you to print, in the middle of a report, a cross-section of an airfoil from an x:y coordinate file — very easy to do with the Polyline() function.
Vic has made this class work with both 16 and 32 bit VdB, so users of 5.x are not left out.
I believe that Vic’s Printer/Preview class goes far beyond most other custom classes provided by users, and can be properly considered a major addition to the VdB programming environment. Vic deserves much credit for producing such a classy product and then giving it to the dBase community at no cost.
Be sure to take advantage of Vic’s own instructions — he provides a help file (dbprint.hlp), several sample forms (test.prg, test1.prg, test2.prg, test3.prg), and there is much useful information to explore in his well-documented Printer.prg.
Download the Printer/Preview Class:Before trying out the Printer/Preview class, you’ll need to download it from dBASE Code Library. The current version uses InstallShield to install the class.
Set Up a Test Folder: After
the install is complete, copy the following files to a test folder:
|
FILENAME.H FONTS.H GOTO.WFM NVIEWLIB.DLL (or NVIEW16.DLL if using VdB5.x) PAGES.WFM PREVIEW.H PREVIEW.MNU PREVIEW.POP PREVIEW.WFM PREVIEW32.DLL (or PREVIEW16.DLL if using VdB5.x) PRINT.H PRINTDLG.WFM PRINTER.H PRINTER.PRG STRUCTS.CC VSTRUCT.H WINAPI.PRG |
|
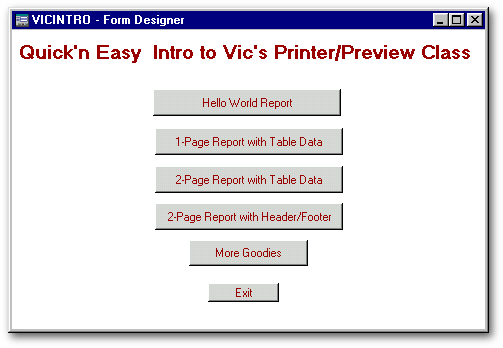
Also download this zip file called bu08vic.zip and unzip it into your test folder. It contains VicIntro.wfm (screen shown below) and VicMore.wfm which include all the code listed in this article. The zip file also includes a sample table called CUSTOMER.DBF which is just a de-memo’d and de-MDX’d version of the Customer.dbf table that shipped with VdB5. The image Earth.bmp is also included to demonstrate the printing of images.
All of the code in VicIntro.wfm and VicMore.wfm employs XDML (instead of OODML) and VdB5 code conventions so users of VdB5 can use it as well. Under Properties | Desktop Properties, set the current directory in VdB to your test folder, and try out VicIntro.wfm as you read what follows.

The Speedtip on each button above tells which procedure is called by the OnClick() for the button. The More Goodies button opens VicMore.wfm.
What’s to follow
We’ll start with a structural overview, then a “Hello World” report, then add new code to introduce table data, multiple pages, and a few bells/whistles. Some possibly useful reference material is included in the Appendix.
Here’s a Table of Shortcuts:
| 1. Overview
of report structure
2. “Hello World” report 3. Add a table to a 1-page report 4. Expand the table data to a 2-page report 5. Define more fonts, some column position, and manage header/footer, etc. 6. More goodies
|
Every Vic report has the following structure:
Code for the above is largely boilerplate except for the middle section — writing the table (or other) data, and non-generic header/footer functions.
Below is a “Hello World” example of a Vic report. To keep things simple, no table data is included. Several functions of the Printer class are used such as StartDoc(), DefineFont(), SetFont(), StartPage(), AtSay(), NextRow(), EndPage(),and EndDoc(). These are fairly self-explanatory, and are described as needed below. More info on positional functions is in the Appendix.
Hello
World — as simple as it gets.
|
Procedure TestPrn1 * A logical var, lPreview, is used below.
Normally you’d refer to
lPreview = .t. set procedure to printer.prg additive && get the proc in memory local p && Set up a var to hold the new print object reference * Now instantiate with the intention
to either preview first, or directly print:
* ------- A little set-up if p.hDC = -1
if p.CreateDC() == 0
* Let's define a font --- this is optional,
since there is a default.
* The above font definition will thus establish a font called 1, * and it will be an Arial typeface, 11 point, and neither bolded, underlined, nor italicized * ----- end setup * Now start the doc. You need this command
only once per print job.
* Set our pre-defined font as the default
(we have only one to set at this point)
* Start the first page (same command for
starting any new page)
* Optional — bump things down a couple
of rows; looks nicer.
* Print the "Hello World" message at the
current line, and 1" in from the left edge of paper
* End the page.
* And end the doc. You also need only one
of these commands per print job.
* Release the Printer object and close
the procedure
|
|
The Preview should look like what you see below (yes, this point size is illegible while zoomed out).

Move the mouse pointer over the image and it should change to a magnifying glass. By clicking on the image, you can zoom in and out.
While we’re here, let’s take a look at the toolbar:

The first three buttons provide some interesting and powerful options for managing the images viewed in the Preview. The first button provides a means of attaching the current image (as a metafile) to an e-mail message. The second button recalls to the preview screen a previously saved page image, and the third saves the current page image to a file. Since none of my apps uses these features, I remove these buttons by editing Preview.wfm.
The remaining buttons are more standard: they move between pages, zoom, print, and close the preview (without printing).
If you wish to print, press the print button to get the print dialog box shown below.
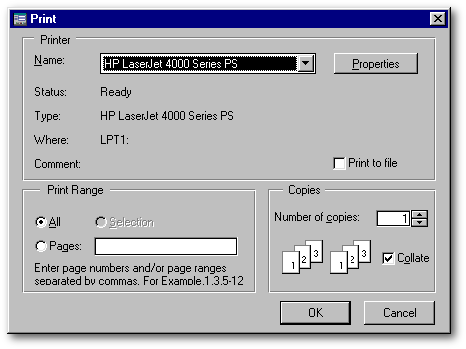
There are a couple of glitches concerning this dialog box — the “Number of Copies”option works if you have just come from the Preview, but not if you have printed directly, i.e., p = NEW printer(.t.). And, if your report has many pages and you wish to include a page range or a specific page that has a 0 (zero) in it, the error trapping routine will reject the entry, since it has been instructed to accept only digits 1-9.
The “Print to file” option can be useful, because if you set up a “Generic/text only” printer in Windows, the report will be sent to a readable ASCII file. The formatting of the text in that file will be distorted unless the original report was formatted using a mono-spaced font such as Courier, but this is nevertheless a handy way of getting ASCII data out of a report.
So much for the first simple report — pretty easy, right? Well, it’s also very easy to include table data. A very simple example of how this is done is shown below, still staying with just a 1-page report. Most of the code from the first example is still here, and newly added code is BOLD so you can easily see what’s been added.
Note: Keep in mind here that you can use tables/queries that you already have open in the form if that’s where the to-be-printed data is, or you may create new queries (or open tables) as needed. If you do use an existing query that is displayed in a grid, you may have to deal with some visual effects in the grid if you loop through the rowset. You may wish to use WINAPILockWindowUpdate to freeze the form during printing.
Add table data to a 1-page report
Here’s where you’ll use the Customer.dbf table that was included in the file you downloaded earlier, bu08vic.zip.
Note:
When you run this report, you may notice that there is a Cancel
button on the progress form. If you wish to cancel, and have time to press
this Cancel button before the progress form disappears, the print
job will be cancelled. For a very short report (such as the “Hello World”
report), the progress screen will probably disappear too soon to allow
you to press the Cancel button. You can code in a verification
message for Cancellation, but it may be problematic.
|
Procedure TestPrn2 * A logical var, lPreview, is used below.
Normally you’d refer to
lPreview = .t. set procedure to printer.prg additive && get the proc in memory local p && Set up a var to hold the new print object reference * Now instantiate with the intention
to either preview first, or directly print:
* ------- A little set-up if p.hDC = -1
if p.CreateDC() == 0
* Let's define a font — this is optional,
since there is a default.
* The above font definition will thus establish a font called 1, * and it will be an Arial typeface, 11 point, and neither bolded, underlined, nor italicized * ----- end setup * Get the table ready to use -- you can
USE the table here or
select select()
* Now start the doc. You need this command
only once per print job.
* Set our pre-defined font as the default
(we have only one to set at this point)
* Start the first page (same command for
starting any new page)
* Optional — bump things down a couple
of rows; looks nicer.
* Print the "Hello World" message at the
current line, and 1" in from the left edge of paper
p.AtSay(p.nLine, 1, "Customers")
* Write the table contents
endscan
select customer
&&
Close table
* End the page.
* And end the doc. You also need only one
of these commands per print job.
* Release the Printer object and close
the procedure
|
|
The preview should look like this:
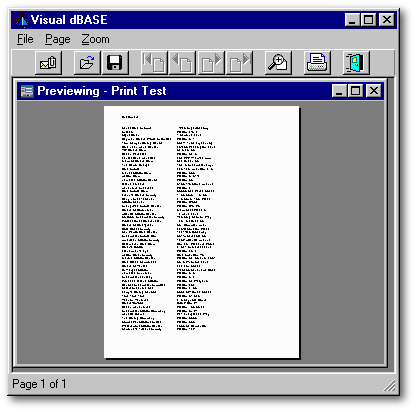
There is a header in the upper left corner, and the table data is beneath. Since this is still just a 1-page report, the buttons for moving from page to page are greyed out.
Expand table data to a 2-page report
All we need
to do to get enough data to warrant additional pages is put a blank line
or two between records… but then we also need to add some code to manage
the situation when we run out of space at the end of a page. Simple to
do… see BOLDed, Red-colored code below. The new code will test for
remaining space via the RowsLeft() function. If there isn’t enough space for another record, it will end the
current page, start a new one, and put the header in at the top. That’s
all it takes.
|
Procedure TestPrn3 * A logical var, lPreview, is used below.
Normally you'd refer to
lPreview = .t. set procedure to printer.prg additive && get the proc in memory local p && Set up a var to hold the new print object reference * Now instantiate with the intention
to either preview first, or directly print:
* ------- A little set-up if p.hDC = -1
if p.CreateDC() == 0
* Let's define a font — this is optional,
since there is a default.
* The above font definition will thus establish a font called 1, * and it will be an Arial typeface, 11 point, and neither bolded, underlined, nor italicized * ----- end setup * Get the table ready to use -- you can
USE the table here or
select select()
* Now start the doc. You need this command
only once per print job.
* Set our pre-defined font as the default
(we have only one to set at this point)
* Start the first page (same command for
starting any new page)
* Optional — bump things down a couple
of rows; looks nicer.
* Print the "Hello World" message at the
current line, and 1" in from the left edge of paper
p.AtSay(p.nLine, 1, "Customers")
* Write the table contents
select customer
&&
and close table
* End the last page.
* And end the doc. You also need only one
of these commands per print job.
* Release the Printer object and close the
procedure
|
|
Here’s the preview — it looks just like the previous one, except now the appropriate buttons are activated to move to page 2 (or to the end, which is also page 2) in the report.
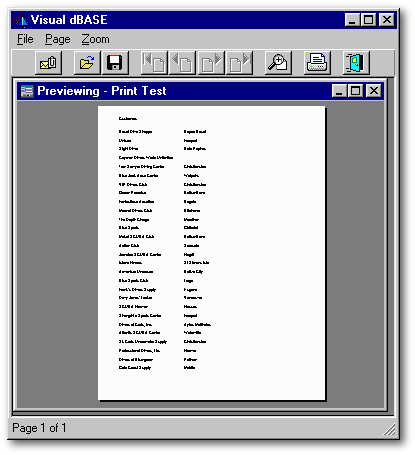
Try out the buttons...
If you leave the preview image onscreen and use the Windows Explorer to examine your Windows temp folder, you will discover that there are some files there named ~wmf????.tmp, the wildcards representing random numbers. For this report, there should be two of them, representing the two page images. They are saved to disk until they are printed. This explains how, with a 150-page report, the Preview lets you zip back and forth between the first and last pages in a second or two (don’t try this with the VdB Report Class — it can take many minutes!). By the way, if you crash the Printer class before the ~wmf.tmp files have been erased, you’ll need to delete them yourself. It’s a good idea to check the temp folder once in a while. After you get your print routine working, this shouldn’t be necessary anymore.
Define more fonts, define some column positions, manage header/footer, and a few new functions
Define some fonts: Generally speaking, unless a report has no header, footer, or other ancillary info besides the data, it will need more than a single font. In this routine, we’ll create a function called DefFonts() (define fonts) which will define a series of fonts — specific typefaces, sizes, and appearances (normal/bold/underline/italics). We can then set the default font anywhere in the report to any one of these fonts whenever we like. The SayHeader() and SayFooter() functions below call several of these fonts in order to give the header/footer a distinctive look.
Define some column positions: It is also useful to define some column positions so that columnar data can be easily and consistently positioned, especially when you decide you need to change the position of a column or two… and you then merely change the column position definition instead of changing values in many AtSay() functions.
Write SayHeader() and SayFooter() functions: Although we employed a crude header in the two examples above, there is a better way to do it — write a header function, e.g., SayHeader(), to which we can pass the current Printer object reference (p) as a parameter so that the function has control over the printer object. So, when we wish the header to print on the current line, we just call the header function Form.SayHeader(p) or class::SayHeader(p). The SayHeader() function then writes its header info, then gives control back to the print routine.
We can treat footers the same way using a SayFooter() function.
A few new functions: The p.cTitle() function provides a means for telling Print Manager what “queue” name to give the document being printed. There is a tiny behavioral problem associated with this function: if you do a preview (rather than printing directly), the p.cTitle that you assign will be preceded by “Previewing - ” in the queue, as shown below. It won’t be if you print directly.

You can “fix”
this behavior by locating the code for the EndDoc() function, on or about line 752 in
Printer.prg,
and changing
|
f.Text = 'Previewing - '+this.cTitle to f.Text = this.cTitle |
|
An additional result of this change will be that the titlebar of the Preview window will not say “Previewing - etc.” either… it will contain only the queue name. This is probably OK, since it’s obviously a preview.
The SayHeader function below introduces p.cDate, which contains the current date, and p.cPage, which contains the current page number. The latter two Printer object properties can be used anywhere, but seem most appropriate in a header.
The p.Line() function is also used in SayHeader().
The p.line() function draws a line using the VertPos/HorizPos//VertPos/HorizPos (Y/X//Y/X)
coordinate format and also specifies a thickness of line:
|
p.Line(10.57, 0.35, 10.57, p.nPageWidth, 7) |
|
would draw a line beginning at a point 10.57 inches down the page and 0.35 inches in from the left edge, and ending at a point 10.57" down the page and the full width of the page. The line will be 7/100" thick. More on lines here.
The
SayHeader() function
below uses AtSayCenter() which centers the text around the specified horizontal position, and AtSayRight() which right-aligns text up to the specified horizontal position (second
parameter):
|
AtSayCenter(2,4.25,"Center this string") |
|
writes the
text 2 inches down the page and centers it around a point 4.25" in from
the left edge, which is the middle of an 8.5"-wide piece of paper.
|
AtSayRight(2,8.1,"Right-align this string") |
|
writes the text 2 inches down the page and right aligns it to a point 8.1" in from the left edge.
Note
on pressing the Cancel button: When Vic writes print routines, he usually
inserts, after each p.EndPage(),
the following:
|
if p.lAborted msgbox('Printing Canceled by User', 'Cancel', 16) endif |
|
This message merely verifies that the user has already pressed the Cancel button in an attempt to cancel printing. I have found that the use of this message in a print routine can have the unexpected consequence of the message being repeated on-screen many times over. The reason for this is not entirely clear to me, and I have avoided using this option and do not use it below.
New code
below in BOLD.
|
Procedure TestPrn4 * A logical var, lPreview, is used below.
Normally you'd refer to
lPreview = .t. set procedure to printer.prg additive && get the proc in memory local p && Set up a var to hold the new print object reference * Now instantiate with the intention
to either preview first, or directly print:
* ------- A little set-up if p.hDC = -1
if p.CreateDC() == 0
* Now use the DefFonts function to define
several fonts at once — pass the Printer object
* Now define some column positions, in
inches---you could easily put this in
* Set the title of the doc for the queue
in Print Manager
* ----- end setup
select select()
* Now start the doc. You need this command
only once per print job.
* Set our pre-defined font as the default
(we have only one to set at this point)
* Start the first page (same command for
starting any new page)
* Optional---bump things down a couple
of rows; looks nicer.
* Print the header by calling the SayHeader
function and passing the
* ---------- Write the table contents
* Manage additional pages---
select customer
&
Close table
* ------------ End the last page. form.SayFooter(p) &&
Call
the footer function
* ---------------And end the doc. You also
need only one of these commands per print job.
* Release the Printer object and close
the procedure
Procedure DefFonts(PrnObject)
Procedure SayHeader(PrnObject)
* Grab the current font name so
we can restore it
p.SetFont(2)
&&
bold
font
p.AtSay(p.nLine, COL11, "Date Printed:") && this will be in bold p.SetFont(1) && switch back to un-bold font * The p.cDate parameter is the current
date
* The AtSayRight() function right-aligns
the text to
* Now draw a line beneath the text
* Make room under the header for
the body of the report.
* Restore the original font
Procedure SayFooter(PrnObject)
* The line below will print a 7/100"-thick
solid line near the base of the page
* Then, just under the above printed line,
all the following goes on 1 text line.
* The AtSayCenter() function center-aligns
the text around the specified horizontal position (2nd parameter)
* The AtSayRight() function right-aligns
the text to the specified horizontal position (2nd parameter)
p.SetFont(cFontTag) &&
Restore the original font
|
|
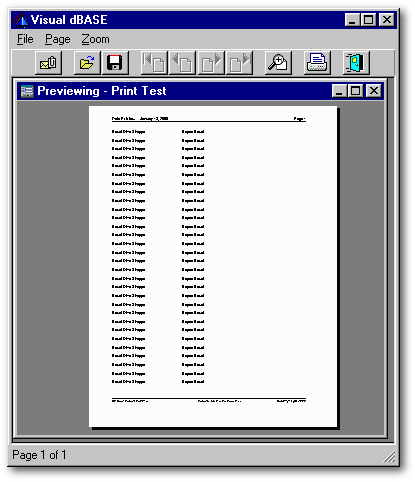
The Testprn4 report is shown below. Notice the lines, header with page number, and footer.
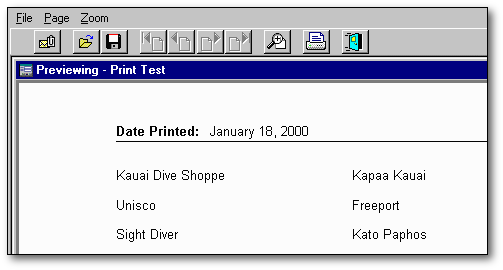
Below is the header at a bit more legible size.
Vic’s Printer/Preview class provides a wide variety of additional tools that provide the means to produce almost any sort of printout that you can imagine. Below is a sampling.
It’s about
as easy as can be to switch back and forth between portrait and landscape
orientation. The default is portrait and does not need to be specified
if portrait is what you want. Also, there’s no need to decide on one or
the other for an entire document — you can switch mid-doc if you like,
but you’ll need to do it in-between pages:
|
p.LandScape() p.StartPage() * page contents... p.EndPage() p.Portrait()
|
|
If you wish to print to specialized pre-printed forms, you may wish to look at SetFormOffsets() in Vic’s help file. This function allows you to retrieve previously saved formatting specifications from the table called form_def.dbf. I have not used this function, but it appears that you would need to create a WFM with access to the form_def.dbf table in order to enter the values specific to a pre-printed form.
AtSayWrap() to print a memo field
This function
provides a means of printing memo (or any other) text within a specified
block on the screen. The function has the following 6 parameters (the last
parameter, which is the font tag, can be left out — I will not describe
it here or use it in code examples):
|
AtSayWrap(nRow, nStartCol, nEndCol, nRowsToPrint, cString, fontTag) |
|
The first 4 parameters describe a rectangular area within which the text will be printed. The 5th parameter is the name of the variable that holds the text to print.
1. nRow: the distance from the top of the page to the top edge of the rectangle — you can use a specified distance in inches, or use p.nLine.
2. nStartCol: the distance from the left edge of the page to the left edge of the rectangle — specify in inches, or with preset Column position, or use p.LeftOffset to get as far to the left as printably possible.
3. nEndCol: the distance from the left edge of the page to the right edge of the rectangle — specify in inches or with preset Column position.
4. nRowsToPrint: the number of rows to print within the other specified boundaries — use an integer, or use the p.RowsLeft() function, which will ensure that you don’t over-shoot the bottom of the page. The number of lines available will depend on the value of nRow, the current font height, and the paper size.
5. cString: — a character variable to which has been stored the contents of the memo field or other data.
The function returns what’s left un-printed of cString. If the whole string got printed in the number of rows you specified, then the returned value will be empty. But if cString was too large to fit in the number of rows you specified, the return value will contain what’s left to print. This is useful since memo field contents can of course vary in size, and may unpredictably spill over the end of a page.
Vic has several
nice examples of the use of this function in his dbprint.hlp help file that is included with the Printer class. Below is an example
derived from his examples. The first page will print a simple example of
text that predictably finishes printing within the designated area. The
second page will print a larger memo that will spill to the next page,
and so includes a loop that will guarantee enough pages to print all the
text. You can tailor yours to suit your length-of-memo needs.
|
Procedure Wrapit set procedure to printer.prg additive local p p = new Printer(.f.,1) if p.hDC = -1
if p.CreateDC() == 0
p.DefineFont(1,"Arial",-12,.f.,.f.,.f.)
* First page — no spill-over.
p.nLine = p.nTopOffSet + p.nLineInc &&
Set
pnLine as high as possible on page
* Second page -- spill-over.
if .not. empty(cRestOfString) &&
Text
remains, so not all of it got printed on this page and we're out of space
p.EndPage()
|
|
AtSayImage() — print a graphics file
Vic uses the
NViewlib.dll (32 bit)
or NView16.dll (16 bit) to print an image (JPG, JIF, GIF, BMP, DIB, RLE, TGA, PCX) within
a specified area, and allows serious distortion/scaling if you so desire.
Here is the function and the parameters:
|
AtSayImage(nRow, nCol, cBitMap, nWidth, nHeight, nTopStart, nLeftStart) |
|
The first two parameters define the location of the upper left corner of the image, and the third tells the filename. That’s really all you need to get the image onscreen; but if you wish to play with the other parameters, you’ll find help in printer.prg and in dbprint.hlp.
You also
have access to RESOURCE images with this function. For example,
|
p.AtSayImage(1,1,'RESOURCE #108') && should display the lighting bolt in RESOURCE.DLL p.AtSayImage(1,1,'RESOURCE EXIT BITMAPS.DLL') && should display the exit bitmap in bitmaps.dll |
|
The example
below shows the Earth.bmp image. Using the nWidth and nHeight parameters can very
quickly lead to very strange results, so use with caution.
|
Procedure AtSayImage set procedure to printer.prg additive local p p = new Printer(.f.,1) if p.hDC = -1 msgbox('User Cancelled Print Job', 'Cancel', 16) release object p return endif if p.CreateDC() == 0 msgbox('Error Accessing Printer', 'Error', 16) release object p return endif p.DefineFont(1,"Arial",-14,.f.,.f.,.f.) p.StartDoc()
p.AtSay(0.5,0.5,"Here's Earth...")
p.AtSay(6.5,0.5,"Here's Earth stretched a
little...")
p.EndPage()
|
|
AtSayWindow() — print a Form with class...
If you have ever needed to use the Form.Print() function in VdB and have actually used it, you will appreciate AtSayWindow(). No… you will LOVE AtSayWindow(). This function actually does what you probably imagined Form.Print() would do; namely, it gives you a perfect rendition of the specified on-screen form on the printer, just the way it looks on the screen. If you have a color printer, so much the better.
The routine
below sets the image of the calling form at 2" down from the top and 2"
in from the left of the page. Notice the parameters are the Y and X positions
on the page in inches, and the object handle of the form.
|
Procedure PrintForm set procedure to printer.prg additive local p p = new Printer(.f.,1) if p.hDC = -1 msgbox('User Cancelled Print Job', 'Cancel', 16) release object p return endif if p.CreateDC() == 0 msgbox('Error Accessing Printer', 'Error', 16) release object p return endif p.NoCancel = .t. && Turns off the cancel button so it isn't captured p.StartDoc() p.StartPage() p.DefineFont(1,"Arial",-12,.f.,.f.,.f.) p.SetFont(1) p.AtSayCenter(1,4.5,"This is what a printed form should look like!") p.AtSayWindow(2,2,form.hwnd) && <---Here's the function p.EndPage() p.EndDoc() p.release() p = null close procedure printer.prg |
|
The only way in which this function is less useful than the built-in Form.Print() is that it doesn’t respect the object.Printable property of form objects (available in v7 only?), which includes/excludes the object from printing when Form.print() is called. So, to not print an object (like a Print button, for example) when using AtSayWindow(), you have to first set the object’s visible property to false.
Important note: When this function captures the image of the form to print, the form has to be open and visible on the screen; i.e., it is not enough to merely instantiate the form and leave it closed. Also, be fore-warned that any overlap by another form will be caught and included in the form’s image. So will speedtip banners. The mouse pointer is not caught. In order to avoid capturing the Print Cancel dialog box, Vic suggests turning off the Print Cancel Dialog before using this method by setting p.NoCancel=.t. You may not need to do this, however, depending on the location of the form on the screen.
This is really
part of the DefineFont() function… the nDegrees parameter (below) specifies how many tenths of a degree to rotate the font.
Since rotation is a font “appearance”, it has to be part of the font definition
and can’t be done on-the-fly with already-defined fonts. You have to plan
ahead.
|
DefineFont(Tag, cName, nPoints, lBold, lUnderLine, lItalic, nDegrees, nWidth) |
|
See SetTextColor below (and Colors procedure in VicMore.wfm) for a demo.
SetTextColor(), and Font Rotation examples
Although
not of much use unless you have a color printer, if you do, this and the
next function are very nice.
|
p.SetTextColor(nRed, nGreen, nBlue) && where the colors nRed, nGreen, nBlue can be values from 0 to 255 |
|
Since text color is not part of a font definition, you can change text colors on-the-fly for your existing fonts.
Below is
a procedure that demonstrates color changes of both text and text background
(for which background mode must be changed to OPAQUE), and font rotation.
|
Procedure Colors set procedure to printer.prg additive local p p = new Printer(.f.,1) if p.hDC = -1 msgbox('User Cancelled Print Job', 'Cancel', 16) release object p return endif if p.CreateDC() == 0 msgbox('Error Accessing Printer', 'Error', 16) release object p return endif p.DefineFont(1,"Arial",-15,.t.,.f.,.f.) * Define some additional fonts to demonstrate
font rotation..
Col = 3 &&
Init a column value for use below
p.SetFont(1)
&&
basic
Arial, not rotated
* Change text colors a few times
p.SetTextColor(0,255,0)
p.SetTextColor(128,128,255)
p.SetTextColor(255,128,0)
p.SetTextColor(218,168,37)
* You must change the background to opaque
* Change background colors a few times
p.SetBkColor(0,255,0)
p.SetBkColor(128,128,255)
p.SetBkColor(255,128,0)
p.SetBkColor(218,168,37)
* Show rotated fonts by including the font
tag in the call to AtSay()
p.EndPage()
|
|
The background
color on which text is printed can also be controlled. The default is of
course white (no color). Without a color printer, there may not be much
reason to employ this, although white letters over a dark grey or black
background, perhaps as a header or footer, can look pretty nice.
|
p.SetBkColor(nRed, nGreen, nBlue) && where the colors nRed, nGreen, nBlue can be values from 0 to 255 |
|
See SetTextColor above (Colors procedure in VicMore.wfm) for a demo.
This one is pretty amazing — it lets you scale the size of the entire page up or down to any degree you like. You can easily hook it up to spinbox controls that let the user decide how much to scale. The ScalePg() procedure below fills most of a page with text on page 1, then on page 2 it sets the scale to 50% in both the X and Y axes, then re-writes the same text.
The function is p.SetScale(X-axis %,Y-axis %) where 100% for each is the default.
In experimenting
with this function in the display of text, the Y setting (second parameter)
seems to do most of the shrinking/enlarging — you get about the same result
with p.SetScale(100,50) as you do with p.SetScale(50,50).
Perhaps this is because of the nature of fonts — if the point size decreases
(Y axis), the X-axis automatically decreases as well. With images, however,
the X parameter stretches or shrinks the image horizontally (and separately
from the Y-axis, if you wish) as you might expect. It may be risky to assume
that a nicely formatted combination of text and graphic images can be safely
shrunk to 1/2 size and retain the formatting, but it’s worth a try.
|
Procedure ScalePg set procedure to printer.prg additive local p p = new Printer(.f.,1) if p.hDC = -1 msgbox('User Cancelled Print Job', 'Cancel', 16) release object p return endif if p.CreateDC() == 0 msgbox('Error Accessing Printer', 'Error', 16) release object p return endif p.DefineFont(1,"Arial",-14,.f.,.f.,.f.) * First page, with scaling defaulting to
100% in both X and Y axes.
* Second page, with scaling set to 50%
in both X and Y axes.
p.EndDoc()
|
|
SetBkMode(): Use transparent background to allow superimposition of text on text or image
Most folks probably don’t routinely intend to write more than a single chunk of text to the same location on a page, but sometimes you may want to — I use it to plaster “Please Register!” in a very large (75pt or so) light-grey font in the background of reports in a shareware program. So, the Printer class allows you to specify whether the text background is transparent (the background of new text does not obliterate existing text on which it is superimposed), or opaque (the background of new text obliterates existing text on which it is superimposed).
Vic probably didn’t intend it this way, but the “default” setting for background transparency depends on whether you use the Preview (in which case it defaults to transparent) or not (in which case it defaults to opaque). Since you can control the background setting, be aware of what your needs are and use the code below after instantiating the printer object. Then, background behavior is consistent regardless of whether you use Preview or direct printing.
p.SetBkMode() can accept either a 1 or
a 2 as
its parameter. 1 means
“Transparent”, and 2 means
“Opaque”. Although you can just use the numbers as parameters, it’s probably
best to establish two #defines to equate these two words with their respective values (although if
you are using Printer.h,
they are already defined for you). Then you can use the words —
it’s easier to keep things unconfused. This setting can be changed anywhere
in the code after instantiation of the printer object. I do the #defines in the SetFont() function, or as in the code below, shortly after instantiation of the printer
object (so you haven’t forgotten by the time you need them):
|
#define TRANSPARENT 1 #define OPAQUE 2 |
|
Then, to
set the background to transparent (assuming Printer object called “p”):
|
p.SetBkMode(TRANSPARENT) |
|
and to set
the background to opaque:
|
p.SetBkMode(OPAQUE) |
|
Regardless of background setting, characters themselves always over-write existing characters in the same space, so any text that is intended to be in the background must be sent first; text sent subsequently will appear “on top of” the text sent first.
Here’s an
example (Opaque|Transparent Background button in
VicMore.wfm):
|
Procedure BGs set procedure to printer.prg additive local p p = new Printer(.f.,1) if p.hDC = -1 msgbox('User Cancelled Print Job', 'Cancel', 16) release object p return endif if p.CreateDC() == 0 msgbox('Error Accessing Printer', 'Error', 16) release object p return endif #define TRANSPARENT 1
p.DefineFont(1,"Arial",-14,.f.,.f.,.f.)
p.StartDoc()
p.SetBkColor(255,255,255)
&&
Set
background color to white
p.SetFont(3)
p.SetTextColor(0,0,0)
&&
Back to black
* Reset p.nLine to top of printable part
page
* Fill page with text......
* Background is already set to transparent
* Now set background to opaque
p.SetBkMode(1) && Set back to transparent again... p.SetFont(3)
&&
Big rotated font
p.AtSay(10.5,1,"In the foreground..")
p.EndPage()
|
|
Vic provides us with access to many of the WINAPI shapes — polygons, polylines, ellipses, rectangles, etc., as well as to the pens and brushes with which to render them. A pen is used for line and outline drawing; a brush is used to fill a shape. You can use the shape functions with default settings if you like, in which case there is no need to define a pen or a brush.
But since it’s fun to fool with other-than-default settings for these tools, let’s talk pens and brushes first.
Note: if you set procedure to printer.h additive, you will have all the #defines listed below.
Pens:
Here’s the function to define a pen (analogous to defining a font):
|
p.DefinePen(Tag, nStyle, nColor, nWidth) |
|
1. The Tag parameter is just like the tag in DefineFont() — it can be any descriptive name that pleases you, and you will use it later as the parameter for SetPen() to specify the pen to use. If the tag is character, e.g., “Pen #1”, use quotes. If you use an integer, e.g., 1, don’t use quotes.
2. The nStyle parameter requires either a number or a #define’d
description from the list below:
|
* Pen Styles * #define PS_SOLID 0 #define PS_DASH 1 #define PS_DOT 2 #define PS_DASHDOT 3 #define PS_DASHDOTDOT 4 #define PS_NULL 5 #define PS_INSIDEFRAME 6 |
|
3. The nColor parameter needs a color in this format: RGB(255, 0, 0) so you’ll need the values of the color you want.
4. The nWidth parameter is in inches, so avoid whole numbers unless you want very thick lines and outlines. You’d generally want 0.1 or less.
To set a
particular pen as the default, use
|
p.SetPen(Tag) |
|
whose parameter is the tag for the pen you want. Use quotes around the tag if the tag is not an integer, e.g., SetPen("MyFirstPen").
Brushes: Here’s
the function to define a brush:
|
p.DefineBrush(Tag, nStyle, nColor, nHatch) |
|
Analogous to defining a pen as
described above, nStyle is the Brush Style, and nHatch is the Hatch Style. Below are #define’d
choices: [I did preliminary tests of a few of these, but did not figure
them all out — take a look in the WinAPI Help for more info]
|
* Brush Styles * #define BS_SOLID 0 && Solid color #define BS_NULL 1 && No fill #define BS_HOLLOW BS_NULL && Ditto... #define BS_HATCHED 2 && Hatch-types are described below #define BS_PATTERN 3 #define BS_INDEXED 4 #define BS_DIBPATTERN 5 * Hatch Styles && You must
choose the BS_HATCHED brush style (see above) for these to work
|
|
Shapes: Let’s start with the simplest shape — a line. Vic has two functions, one called Line() and one called Line1(). He advises us to use the latter function, since the former is being phased out.
|
Line1(nTop, nLeft, nBottom, nRight, penTag) |
|
The first two parameters define the y/x (vert/horiz) position of the start of the the line, the next two parameters define the y/x position of the end of the line, and the last parameter lets you specify a penTag for drawing the line. No brush is needed, since lines don’t have anything to fill.
To work with shapes such as boxes
and ellipses, you’ll need a pen to draw the outline and a brush to fill
(if you wish to fill with something other than the default). If you wish
to have the option to not fill a shape, you’ll need to define a
brush with the BrushStyle set to 1 (null).
|
Ellipse(nTop, nLeft, nBottom, nRight, PenTag, BrushTag) |
|
Using 2, 2, 4, and 4 inches, and 2, 5.5, 2.5, 7.5 inches for the positional parameters, here’s a circle and a flattened circle, respectively:

|
PolyLine(aPoints, pentag) |
|
You’ll need a 2-dimensional array
for the Polyline() function, each pair of values in the array representing the two coordinates
(y/x, or vert/horiz) of a point. There is no brush (fill) for a Polyline
— see Polygon() below if you need fill. The following example
|
aPoints = NEW ARRAY(1,2) * First point
* Second point
* etc...
aPoints.Grow(1)
aPoints.Grow(1)
aPoints.Grow(1)
* Then do the polyline....
|
|
produces this polyline:
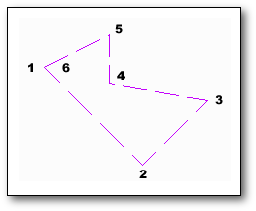
The points have been numbered in
this GIF file… note that points 1 and 6 have the same value, so the shape
is closed.
|
Polygon(aPoints, pentag, brushtag) |
|
Analogous to Polyline above, but
if the points do not return to the origin (in the example above, they do
return to the origin), the system will create a line that connects the
last and first points. The polygon will be filled with the current brush
pattern.
|
Arc(nTop, nLeft, nBottom, nRight, nyStart, nxStart, nyEnd, nxEnd, PenTag) |
|
The first four parameters are the upper-left/lower-right coordinates of a bounding rectangle which will enclose the arc. The next four parameters are the two coordinates that define the starting and ending points of the arc.
Here’s a description of the Arc() function from the Win SDK: “The arc drawn by using the Arc function is a segment of the ellipse defined by the specified bounding rectangle. The starting point of the arc is the point at which a ray drawn from the center of the bounding rectangle through the specified starting point intersects the ellipse. The end point of the arc is the point at which a ray drawn from the center of the bounding rectangle through the specified end point intersects the ellipse. The arc is drawn in a counterclockwise direction. Since an arc is not a closed figure, it is not filled.”
Here is code for an arc, and the
resulting image:
|
p.Arc(6.7, 3, 7.7, 4, 3.5, 6.7, 7, 3, 2) |
|

|
Chord(nTop, nLeft, nBottom, nRight, nyStart, nxStart, nyEnd, nxEnd, PenTag, BrushTag) |
|
Chord() appears to be the same as Arc() except that the ends are joined by a line, and the resulting closed shape is filled.
Here is code for a chord, and the
resulting image:
|
p.Chord(6.7, 5, 7.7, 6, 5.5, 6.7, 7, 5, 2, 1) |
|

|
Pie(nTop, nLeft, nBottom, nRight, nyStart, nxStart, nyEnd, nxEnd, PenTag, BrushTag) |
|
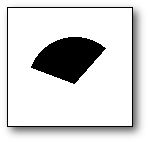
Here’s the means to write your own pie-chart function! The Pie function also uses a bounding rectangle, and (from the SDK) “The Pie function draws a pie-shaped wedge by drawing an elliptical arc whose center and two endpoints are joined by lines." and "The center of the arc is the center of the bounding rectangle.”
Here is code for a pie slice, and
the resulting image:
|
p.Pie(6.7, 1, 7.7, 2, 1.5, 6.7, 7, 1, 2, 1) |
|
|
Rectangle(nTop, nLeft, nBottom, nRight, PenTag, BrushTag) |
|
Pretty self-explanatory — provide
coordinates, pen, and brush and get a rectangle.
|
RoundRect(nTop, nLeft, nBottom, nRight, nEllipseWidth, nEllipseHeight, PenTag, BrushTag) |
|
Same as Rectangle(), but with rounded corners defined by the width and height of an ellipse. This may not be so easy to imagine, so here is an example of varying ellipse width/heights:
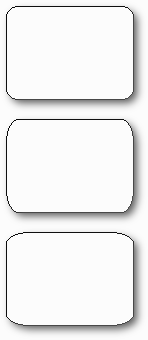
The code that produced these three
rounded rectangles is shown below (also in the
Shapes() procedure, below):
|
p.RoundRect(2, 1, 3, 3, 0.25, 0.25, 'DEFAULT', 'DEFAULT') p.RoundRect(3.2, 1, 4.2, 3, 0.25, 0.5, 'DEFAULT', 'DEFAULT') p.RoundRect(4.4, 1, 5.4, 3, 0.5, 0.25, 'DEFAULT', 'DEFAULT') |
|
Widths and heights are in italics. The first has symmetrical (identical) width/height values (0.25 each), while the other two are asymmetrical, having different width/height values (0.25 and 0.5, or the reverse).
Here’s the
Shapes() procedure from
VicMore.wfm:
|
Procedure Shapes #include printer.h set procedure to printer.prg additive
&& get the proc in memory
p = new Printer(.f.,1) &&
Setting
this parameter ".f." means preview instead
* ------ A little set-up
if p.CreateDC() == 0
p.StartDoc() *------------Page 1--Lines
p.line1(1,1,1,7) && Uses defaults....thin black pen * DefinePen(Tag, nStyle, nColor, nWidth)
p.SetPen("THICKER_PEN")
p.DefinePen("THINNER_PEN",PS_DASH,RGB(200,0,255),0.003)
&& 3/10 inch and purple
* Two crossed lines using the two pens.
p.SetPen("THINNER_PEN")
p.EndPage()
*------------Page 2--Rectangles and circles/elipses
p.Rectangle(1, 6, 3, 8, "THICKER_PEN", "Fill1") p.ellipse(1, 1, 5, 5, "THICKER_PEN", "Fill1")
p.RoundRect(5, 1, 6, 3, .25, .25, 'DEFAULT',
'DEFAULT')
p.Pie(6.7, 1, 7.7, 2, 1.5, 6.7, 7, 1, 2, 1) p.Arc(6.7, 3, 7.7, 4, 3.5, 6.7, 7, 3, 2) p.Chord(6.7, 5, 7.7, 6, 5.5, 6.7, 7, 5, 2, 1) p.EndPage()
*------------Page 3--Ellipses and a Polyline
p.ellipse(2, 2, 4, 4, "THINNER_PEN", "Fill1")
* Set up array for the Polyline( ) function
aPoints.Grow(1)
aPoints.Grow(1)
aPoints.Grow(1)
aPoints.Grow(1)
aPoints.Grow(1)
* Do the Polyline( )
release aPoints * Arc and chord examples
p.EndPage() *------------End Page 3 *------------Page 4-- Compare Rounded rectangles
p.RoundRect(2, 1, 3, 3, .25, .25, 'DEFAULT',
'DEFAULT')
p.EndPage() *------------End Page 4 p.EndDoc() release object p
|
|
Final remarks
In this article I have covered most of the features in Vic McClung’s Printer/Preview class. As you can see, it is a powerful addition to the VdB repertoire, and can add substantial usefulness and market value to your programs. I hope you will consider trying this class in an application, not necessarily to wholly replace Crystal or the Report class in VdB7.x, but for those occasional reports or print jobs which cannot be easily produced, or produced at all, by the latter. I find that many of my printing needs are not met by the standard reporting tools, and thus I find Vic’s class to be indispensable.