Setting
up
Custom
Tractor-Feed Printers in Windows
by John L. Creed
of pcExpressWay Consulting — May 16, 2002
SOME
OF US still use tractor feed printers for special custom forms such as
labels, cards, etc. In DOS based programs this was never an end-user problem
because the programmer had absolute control over this situation.
In DOS to Windows program conversions,
I have discovered that:
-
You can produce these same results
within the dBASE Report Class
-
The end-user must set up a printer
via the Printers applet of the Control Panel, and give it a unique name,
and then add the custom paper size to the printer.
-
The steps to do this are totally different
in Windows 9x and Windows 2000/XP.
-
If an end-user is using Windows 9x
and upgrades their OS to Windows 2000/XP, they must redo the setup their
printers or the program will fail. Also the programmer must make a minor
change
The following is how to set up printers
in the known Windows Operating Systems through XP.
Windows
9x
 |
Click the Start
button then
Settings, then Printers.
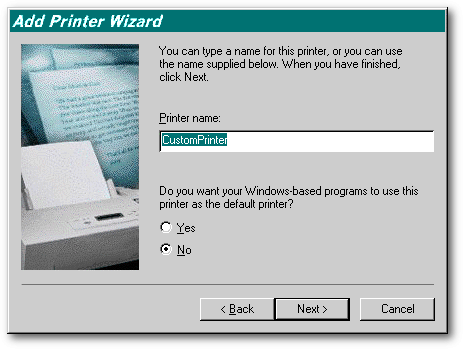
Click the icon that says Add
new printer. Since most of these tractor-feed printers are not Plug
’n Play, you will have to select your brand from the pane on the left,
and then the model on the right. Now click Next, and give this printer
a unique name, like “CustomPrinter”. And continue on to save the printer. |
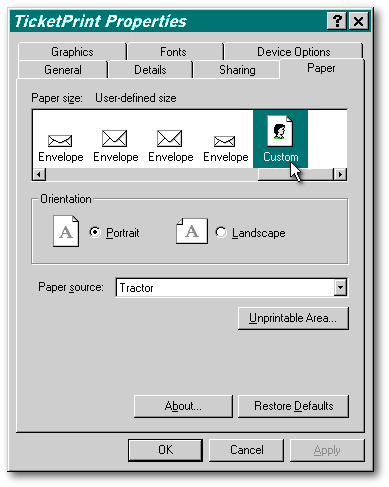 |
Now find this new printer
and right-click on it and select Properties. Find the Paper
tab and then under the Paper size, scroll to the far right and double-click
on
Custom. |
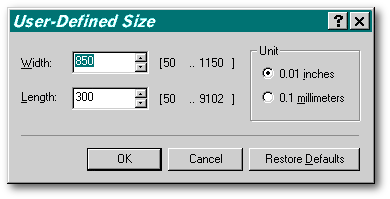 |
You now
have a dialog like this. |
This is where you set the custom size.
The most important part is the length.
-
Width: (has the min / max ranges of
values next to it — here, between 50 and 1150)
-
Length: To the right of the 2 spinboxes,
in the “Unit of Measure” area, where you choose .01 Inches or 0.1
millimeters, we will choose INCHES
We now have to decide how wide and
tall to make this paper. Since we are doing 3 x 8.5 tickets, we will set
the length to the equivalent of 3 inches and the width to the equivalent
of 8.5 inches. Note the width doesn’t really matter so long as it is at
least as wide as the paper. If we divide 3 by .01 we get 300 and if we
divide 8.5 by .01 we get 850. So we set the value of width to 850 and the
value of length to 300. Now click OK, then Apply.
You are now set up from the user
end. The dBASE programmer will set this up in his/her print program to
recognize this specific printer.
It is best for the programmer to
design the report in the latest OS such as Windows 2000 and then make sure
it is compatible with older versions such as Windows 98. This way, should
your customer upgrade or get a new computer, all they will have to do is
follow the next set or rules for custom printers. Note that this programmer
could not get the print program to recognize the custom settings, as there
were 3 steps for me to do, since I had already coded it for win98.
The following is adapted from an
article by Frank Polan that I found while searching the web for help on
this topic. I have used his words and added the screen images to aid in
following the procedure.
For
Win2K/XP
From the web http://www.imcus.cc/printing.html#win2klabel
which states the following:
Q. My labels on my Windows 2000
or Windows XP machine take up a whole page, how do I fix it?
 |
The paper size for
printers under Windows 2000 and Windows XP is set up entirely different
from Windows 95/98 and ME machines. To set the custom paper size in Windows
2000/XP, go into the Printer Control Panel and click on File, and
then Server Properties. |
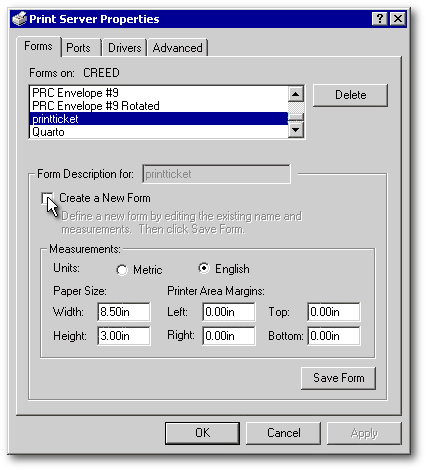 |
Once in the server
properties, check the Create a New Form checkbox and call it “IMC
Label” in the Form Description entryfield. Specify the label size
that your department is using. |
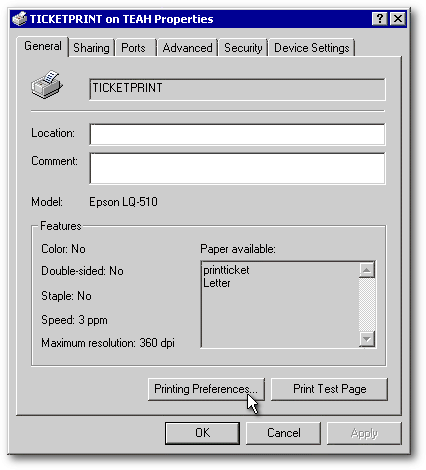 |
Once the label has
been created, you need to go into the label printer's properties and specify
which printer form you want to print to. This is done in two places.
The first place is set by clicking on the Printing Preferences button. |
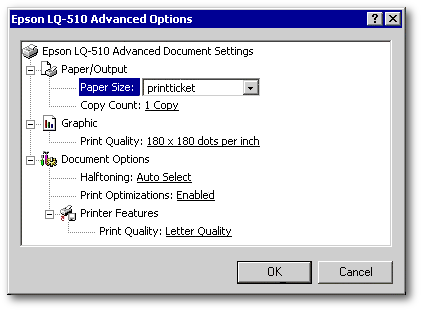 |
Then click on the Advanced
button. Specify the IMC Label here. |
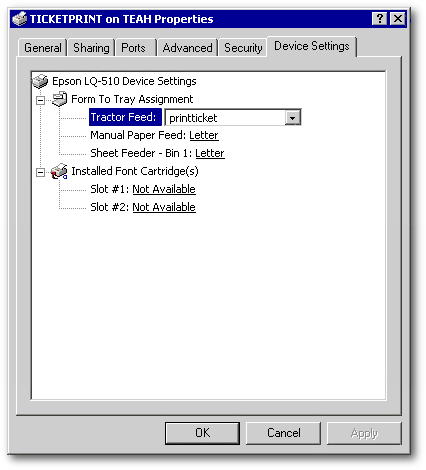 |
You also have to specify
the paper to use on the
Device Settings tab. |
Now once this is done, the programmer
must go back to their report and point the printer to these settings. In
dBASE, I brought up my report in the Designer and then from the Inspector
I found the printer and inspected its properties.

Click the wrench tool next
to the printername property
to invoke the following dialog:
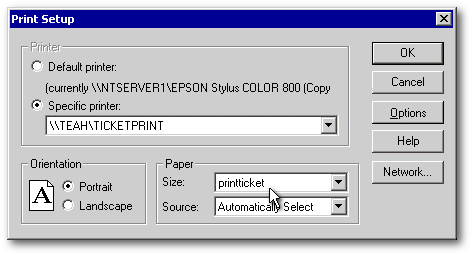
It is important to make sure you
set the paper size as described above.
The
author would like to thank Robert W. Newman and Barbara Coultry, his proofreaders,
for the improvements they brought to this text.


