I am working with a new computer and all I have installed on my PC is dBASE PLUS. My old source code must be retrieved from backup. I finally managed to find my backup, and restored it to my hard drive. Examining the source I also see I have backups of my old InstallShield Express folder from Program Files, a backup of the upgrade from Visual dBASE 7.0 to 7.1 and an upgrade for InstallShield Express.
Once I had Visual dBASE 7 installed, I upgraded it to 7.1 and upgraded InstallShield Express. I remembered that the dBulletin had an article on making changes to InstallShield Express in the dBulletin so that it could be used with dB2K. I reread this article to refresh my memory, as I had already performed this to be used with dB2k. However things have changed since my Visual dBASE 7 application with the new version of dBASE PLUS that I must consider:
|
[VdBase Support] Src=HKEY_LOCAL_MACHINE\Software\dBASE\PLUS\series1\RootDir SrcSub=Runtime Uses1=PLUSrun.exe Uses2=PLUSr_en.dll Uses3=RESOURCE.DLL Uses4=CTL3D32 FILE |
|
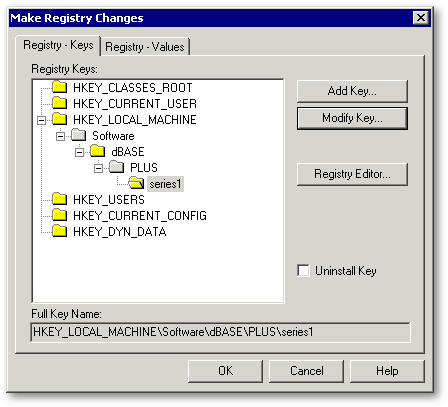
Now by following the article I need to load Install Shield Express (ISX) and open my ISX project file and make some registry changes. Under the section Make Registry Changes, we need to have it look like this for the current version of dBASE PLUS:
Now click the Registry - Values tab and select RuntimePath, and click the Modify Value button.

Make these changes:

Now we are ready. Please follow the instructions from the article dB2K and InstallShield Express from this point on to complete the task.
Finally I open my prj file in dBASE PLUS, and rebuild all and reopen my ISX project file and create the CD image needed for deployment, and test. The deployment of this application went perfectly, and now I am ready to make some changes for DEO. Once this was completed, and the ISX file updated with the folders for DEO, I rebuilt it and tested again. Everything went perfectly.
What about Inno Setup?
I have heard many great things about Inno Setup, and now I am ready to see what this is all about. I searched the dBASE site and found an article in the dBulletin by Robert Bravery. By reading this I also discover another document by Ken Mayer that is in the Knowledgebase. I read this article as well, and now I am ready to download Inno Setup and check it out.
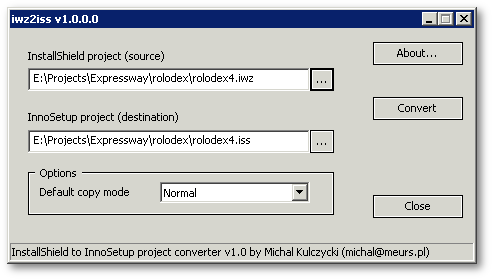
I navigate to http://www.jrsoftware.org and investigate. Finally I go to the download section and download the Quick Start Pack, ispack-5.0.8.exe. Next, I go to the 3rd pary tools section at http://www.jrsoftware.org/is3rdparty.php and download Iwz2iss by Michal Kulczycki. To be sincere, I am a beginner with Inno Setup, this could be a great tool to use to see how an .ISS script would look like.
Installing the Quick Start Pack
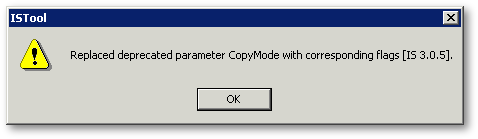
The Quick Start Pack is launched, and during the setup process I am prompted to download and install some of the 3rd party tools. Im starting to see from this installer that Inno Setup is a powerful deployment application. Finally I have this installed on my PC, and I install the Isx2iss application. I am curious to see how this works, so right away I run Isx2iss and convert the ISX script that was used above to an .ISS file, and open it up in the ISTool program and click the Convert button.
Next open it in ISTool. I get the following dialog box at this point, and click OK to dismiss the dialog.
Now by examining the script, I
can see that some changes need to be made as far as the BDE goes. I remember
this in an article of the dBulletin Issue 9 by
Robert Bravery.
|
; This InnoSetup project file was generated by iwz2iss converter (1.0) ; by Michal Kulczycki (michal@meurs.pl) ; WWW: http://www.strony.wp.pl/wp/mikequ/ ; Source IWZ file: E:\Projects\Expressway\rolodex\rolodex4.iwz
; Error & warning messages generated during conversion:
[Setup]
|
|
However I do not want to include the dBASE Runtime or BDE in my install script. Going back to the subject of my original ISX script, I had also created a compact installer that did not include the runtime or BDE. Now I convert this compact version to iss with the Isx2iss program, and this one needed no changes. Click for the script
Test Running the new Inno Script for the first time
I uninstall the application from my test PC, and make sure everything is removed. Now I run the new Inno Installer that does not include the runtime or BDE, and it installed perfectly! Not only was it a perfect install, but it was extremely fast. I tested the uninstaller and it went so fast I couldnt believe it worked until I checked. Wow, what a wonderful tool. Now I am ready to experiment with ISTool, and see if I can do some of the things I didnt believe I could do with ISX. I reread Ken Mayers article again, and left it on the screen for quick reference. This is going to be fun.
Building a Custom Install with ISTool for Inno Setup 4.1.8
I have had the privilege of building a custom dBASE application for a company called LandCoast. This is quite complex in the directory structure, and I didnt believe that ISX could handle this, so I used the dBASE runtime installer and a zip file of the application directory. This works great but there are things I must do before I create the zip file, so that existing data on the target machine doesnt get overwritten with my old test data. Therefore an .ISS installer would be great for this as I could specify what folders/files need to be included in the install package. Keep in mind I havent ever created an .ISS script from scratch and I would like to thank Ken Mayer for his article, as it made my task so much easier to do and understand.
Now that I am ready, there is a very important issue to deal with especially for future development.
The dBASE Runtime Installer
This Runtime Installer has been/was developed by the fine professionals at dBase, LLC for the purpose of installing the BDE and dBASE Runtime files on an Internet Service Providers web server for hosting dBASE Web applications. Since I also host a few such web apps, and used this installer, I realized that I really didnt need to have a 3rd party installer for deployment of my applications, because I could use a zip file and provide my customers with either a private download link, or on CD.
Why take the chance of making a
mistake with my new install package, or fouling up an existing dBASE Runtime
installation? We have decided that we will let the dBASE Runtime Installer
take care of this issue from here on out. That said we are now ready to
see if we can build a custom installer with Inno Setup.
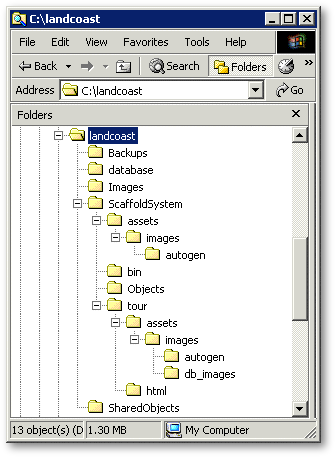 |
This installer will
not allow the user to change the install directory for many reasons. Here
is a screen shot showing how the application is deployed and how we want
it to install from scratch on an empty machine. Note that the installer
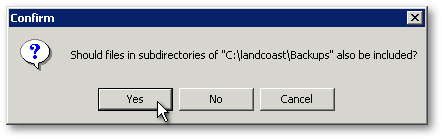
will not ever include anything below the Backups Folders or the
database folder. In this case, I supply the data in a separate package.
|
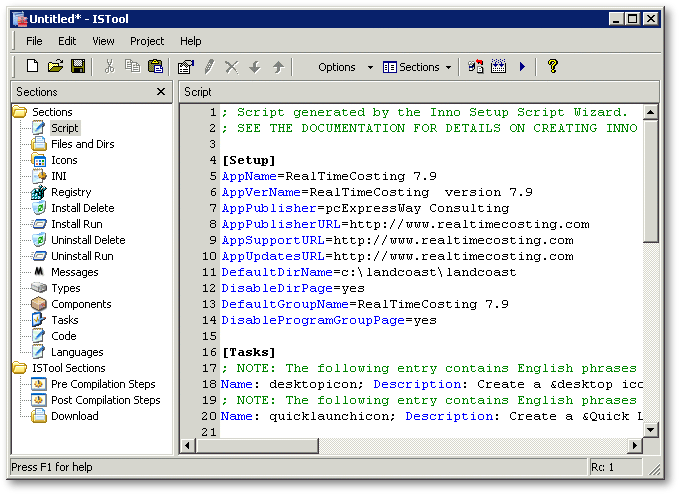
Now we open the ISTool from our Desktop and examine the application for the first time. I now open some of the sample scripts and the actual .ISS script used for the .ISS installation.
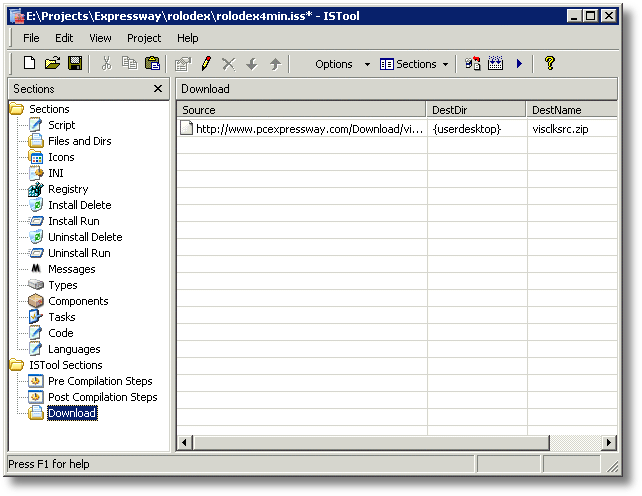
Under ISTool, I can click on an object on the left, to edit the section in a visual tool on the right

Now we are ready to create the new file, so we click the New File icon on the toolbar.

Then...
...and...
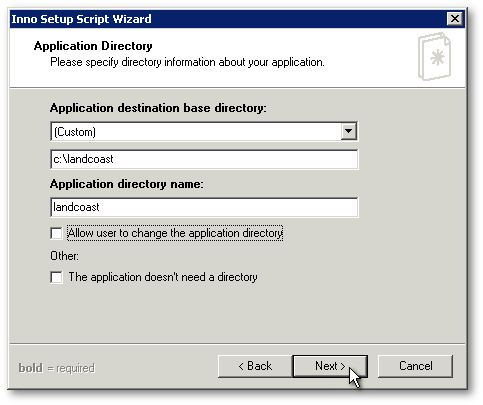
Note that I have made a mistake
here in the two names. The first one probably should be
C:\ and the second one
should be landcoast.
You will see this in the script as c:\landcoast\landcoast.
We do not want to allow the user to change the installation directory.
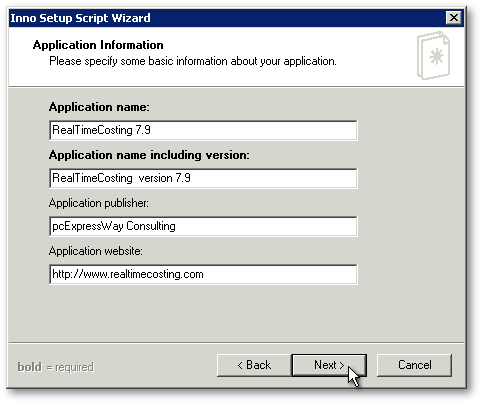
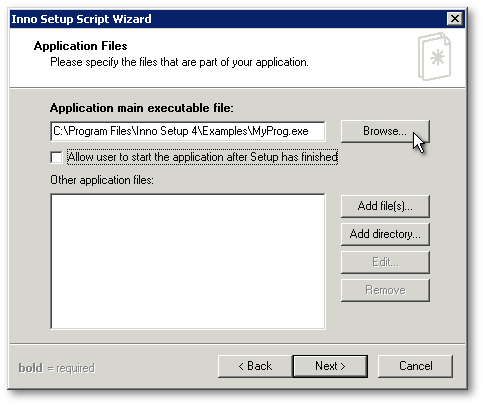
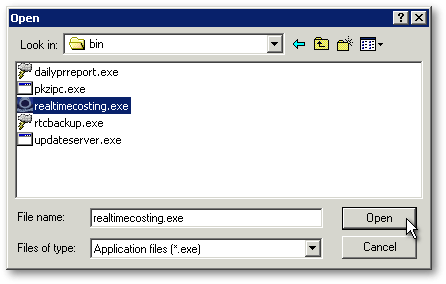
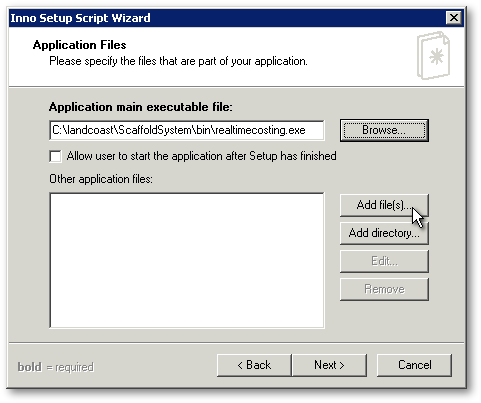
Next, we specify the name of the main executable.
 |
 |
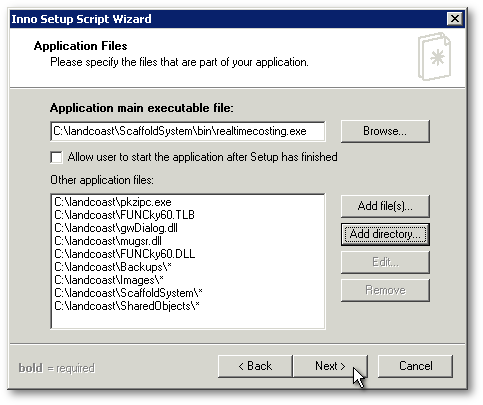
Now we will add files to the root directory of our program...
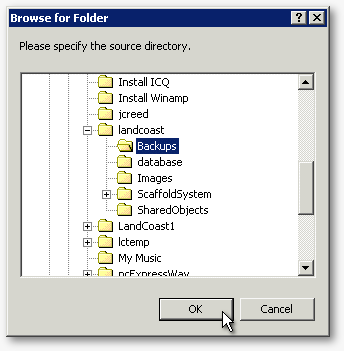
...and now the directories...
 |
 |
...and check out this next dialog. If you looked at the previous converted script, you see each file listed individually.
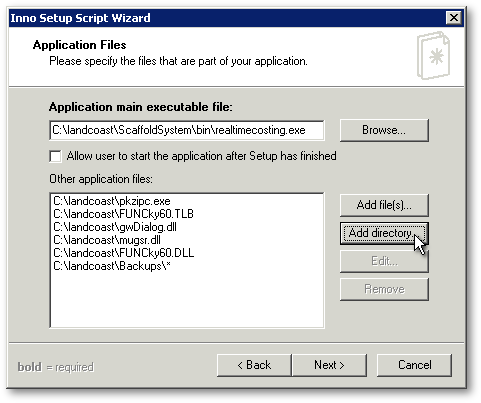
and we continue until we have all of our directories.
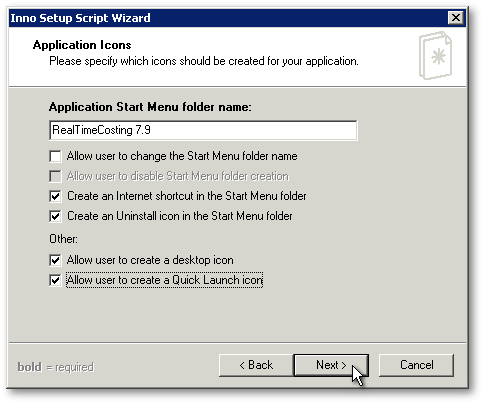
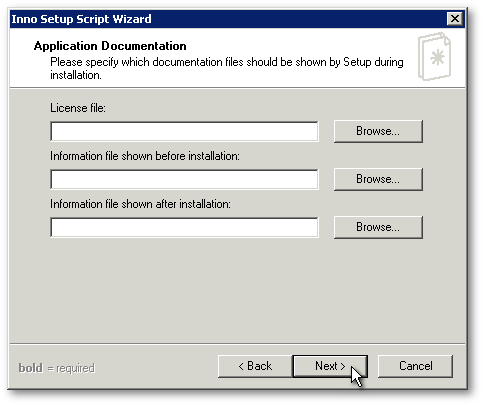
and we follow the next two items and click Finish.

and our new untitled script:
I had to adjust the script to take into account the subdirectory location on the target machine. Once that was accomplished, I saved the script and renamed the source directory to landcoast1, and ran the installer. The fastest thing I have ever seen as far as this app is concerned. The uninstall went perfectly as well.
I have included these two scripts, the one we just made, and the one that was edited afterwards for your review in a zip file.
Conclusion
It took me less than a day from start to finish to get these two cool install packages. I was able to convert an ISX script to .ISS script seemlessly. The next day, I created another script for my banking application. Then I decided to build a dBASE Application Installer similar to the one that dBASE uses in the PLUS series. You can take a look at the result at the Products section of my site. I hope to have the banking app up as a what you see is what you get install, just for the purpose of exposing a wonderful dBASE application that I have ported since dBASE III Plus. Visit my site at for more information.