This paper assumes a few things, such as the developer having a basic working knowledge of dBASE applications. The paper also assumes that you have the most recent version of dBASE PLUS, etc. Note that it is not really necessary to have the most recent version of dBASE, but it doesnt hurt.
What this paper will discuss is web applications, and specifically web applications using dBASE PLUS. There are many things to consider, and this paper will be covering the basics a paper attempting to discuss everything would be lengthy indeed (and for the purpose of the Conference, would probably take at least all day, if not both days scheduled ).
To understand all of this, this paper will start at the basics of web applications, HTML (basic language for web pages), will compare dBASE form controls to those available in HTML and the differences between them, create a simple application and show that the data can be modified easily through a web application, discuss some issues with servers, and some miscellaneous things that may be useful to know.
Note that the lecture at dBCon2004
will, due to time constraints, not be able to cover everything discussed
in this paper. The paper has more information, and the sample web application
that is created should be documented well, and as useful as I can make
it. Also note that even a simple web application is very different from
a more standard dBASE application during the lecture at dBCon2004, we
will not be able to finish the whole application.
Testing
Using Apache
NOTE: There is a huge amount of
information on setting up Apache for use with web applications, and we
dont have time to spend going over all of it here. There is information
in the Knowledgebase (Help menu in dBASE itself, then select
Knowledgebase, select Intermediate, and its the first item
in the list titled: Setting Up Apache for dBASE Web Apps). In addition,
if you install Apache from the dBASE PLUS CD, note that there is a Setup
Apache option on the installer screen.
Web
Application Mapping
If you examine the code were using
for this sample application, we are using what is called Web Application
Mapping we are not using the standard
.exe file extension for
our application files, we are instead using
.dbw, which stands for
dBASE Web. This is discussed in detail the OLH (Online Help) for dBASE
under the topic Web Application and mapping (a sub-topic). There are
several things that need to be done, including telling your operating system
what .dbw means.
Deployment
Deploying your application to a web server is a topic that cannot be covered in this paper, simply because it is too complex. There was an article written by another user on the basics of setting up IIS for use with a dBASE application, but I cannot find it. There are rights issues that must be dealt with, and more. While I have written some web applications in dBASE, including the bug tracking system that is/was used by dataBased Intelligence, Inc., I cannot tell you all the details of what was needed for the actual deployment, as that was done by the web minister for the company.
Back
to the Menu
A
Basic Overview of a Web Application
What is a web application? It is, simply put, a way of interacting with data over the internet or an intranet (an internal version of the internet within a company ). Seems pretty basic, and to one extent, it is. Some examples: A shopping cart (see www.amazon.com for a very good version of this); a Blog (web log); a message board; and a lot more.
To fill in some details, a web application is a series of web pages using HTML, and sometimes other technologies such as JavaScript, Java, ASP (a Microsoft technology), and many other options, to allow an end user (or users) to view data, sometimes add, edit, delete data, view reports, etc.
All that makes a web application different from any other, is that it uses HTML and various HTML extensions and add-ins to do the same things that any other application does. Just like any application, they can interact with data, or they can be completely data independent. Note that when I state that HTML applications can interact with data, that (as well see) HTML form controls do not know what a table is, what a row is, or what a field is well have to do that in dBL code.
There is a lot more information on how web applications work in the help file found when dBASE is installed, at this location: C:\Program Files\dBASE\PLUS\Web\WEBHELP.HLP (This assumes a default installation of dBASE Plus if you installed to a different location, the folder Web should still be there ...)
This help file explains the subject in the topic How Do Web Applications Work? better than I can
Back
to the Menu
HTML
The Universal Language Used for Web Pages
HTML, as noted earlier, is the universal language used for web applications. HTML stands for HyperText Markup Language. Its been around for awhile, and is constantly evolving as needs evolve HTML has had many additions to it over the years including CSS (Cascading Style Sheets), XML (Extensible Markup Language), DHTML (Dynamic HTML) and more. However, it all boils down to the basics HTML. The following is a very short tutorial on HTML.
Basics
First the basics: HTML is text. Simply, succinctly, it is text. Everything that can be done with HTML can be done in any text editor, such as Notepad, Wordpad, the dBASE Source Editor, etc.
There are some things you need to be aware of that can be frustrating to a first time user of HTML, and thats what this mini-tutorial is about. Most of this will not be covered in the presentation at dBCon, due to time constraints.
Line Breaks and Paragraphs
HTML automatically wraps text.
If you enter text in the following manner into any editor, HTML will assume
it is all one paragraph:
|
This is a line and a second line and a third and one more after a blank line |
|
HTML will convert this to:
This is a line and a second line and a third and one more after a blank line
If you really want the text to
appear as entered in the first set, you will need to insert some specific
tags used to handle line breaks, and paragraphs. The difference between
a line break and a paragraph tag is that one inserts a carriage return,
the other inserts a carriage return and a line feed.
|
This is a line<br> and a second line<br> and a third<br> and one more <p> after a blank line |
|
In the discussion on tags below you will note that the paragraph tag can use an ending tag (</p>), but it is not 100% required, and there are places where its easier to just use the starting tag without the ending tag.
Spaces
HTML also assumes and displays
one space between words. If you want more, you have to use what are called
entities. Entities are specific codes that HTML interprets before displaying.
Any good HTML book will have many of these, but you should know about the
non-breaking space:
|
|
|
The non-breaking space can be used
to force spaces, such as at the beginning of a paragraph, where you might
want to simulate a tab:
|
This paragraph has an indent at the beginning. |
|
Angle Brackets
As you can see, angle brackets
are used in HTML a lot. As a matter of fact, they are so important to HTML
that if you use them in your text, they can cause problems if you had
text like:
|
This is a <test> of angle brackets |
|
What would be displayed in the browser is:
This is a of angle brackets
Why did the browser do that? It encountered what it sees as an HTML (or XML) tag, and it doesnt know what it means. So it just doesnt show it.
A single bracket is sometimes interpreted
properly by your browser, however, you will find that different browsers
sometimes interpret things differently. You should instead convert any
angle brackets to the HTML entities:
|
< < > > |
|
Ampersands
Ampersands get treated specially
as well, and again some browsers handle these differently. The ampersand
(&)
character is used to begin an HTML entity (as shown above), so in order
to be sure that your browser sees an ampersand the way you intend it to,
you should use the HTML entity:
|
& |
|
This tells the browser to display an ampersand.
Any good HTML text will give a listing of standard entities. There are a lot, however, so many books will not list all of them. They are called HTML equivalents in the free ANSI Table software.
Formatting Tags
HTML uses what are called tags
to define formatting and special parts of a page. Most tags have a begin
tag and an end tag. An example is the tags used in the first sentence
of this paragraph to make the word tags appear in italics. This actually
looks like:
|
<i>tags</i> |
|
The first tag (<i>) tells the web browser to begin italics all text that follows that tag will be italicized. The second tag (</i>) tells the web browser to end italics. By using this pair of tags, all text between them will be italicized.
There are many tags, and we wont be covering all of them here. Many tags make sense and are pretty basic the following are a few of the basic formatting tags that can be used in HTML note that without becoming a complete primer on HTML, we can only cover a small amount
| Begin | End | Stands for | Looks like |
| <b> | </b> | Boldface | Bold Text |
| <i> | </i> | Italic | Italic Text |
| <u> | </u> | Underline | Underline Text |
| <h1> | </h1> | Header Size 1 |
A Header |
| <h2> | </h2> | Header Size 2 |
A Header |
| <h6> | </h6> | Header Size 6 |
A Header |
| <hr> | (none) | Horizontal Rule |
|
| <p> | </p> | Paragraph | (begin
paragraph with blank row)
Note that the end paragraph tag is not always required, but is probably a good habit to be in. |
| <br> | (none) | Line BReak | (begin new line) |
| <center> | </center> | Center | Centers text on the page. |
| <table> | </table> | Table | You're
looking at a table.
Note that there are many tags involved in working with tables, we will look at some when we start designing our sample web application |
| <font> | </font> | Font | MANY attributes
and options can be used with this, including color and size, as well as
defining specific fonts to be used. More as we start defining our application.
|
The tags shown above are really basic. Some of these (and many other tags, some of which we will discuss as we work on a web application below) have what are called attributes, which are name/value pairs that are used to modify how something works. For example, the table tag used to display the table above, has used the attribute border="1" to tell the browser interpreting the HTML that the table should have a border of size 1 (not using it, the border defaults to a size of zero meaning no border).
At this point, to really understand HTML, I suggest that you:
Note that as with the HTML discussion above, most of this will not be covered during the dBCon presentation of this paper.
The basic interface used on a form in a dBASE application is the entryfield. In addition to this, we have a variety of other useful items, such as the editor, the combobox, the listbox, the radiobutton, and the checkbox. We also have pushbuttons.
There are other objects built into dBASE that we wont be discussing here, as they are not native to HTML forms. The ones mentioned above have equivalents in HTML Form tags, and we will look at the basic options for these here.
In order to specify part of an
HTML page as a form, we must use special tags (surprised?), specifically:
<form>. At the most
basic, this will create a place that the user can interact with controls,
but the user cannot send data through the web server back to your own code.
There are attributes that can be used to specify how to send the data back
to the server, and what program to run when the data is received. As we
build an actual web application we will discuss this. Interestingly, HTML
allows multiple forms in one web page, which is useful for the discussion
below (and could be useful for other purposes, but we wont go into that
in this paper).
Text
Text in a dBASE form is created
by using a text or textLabel object. In HTML text is just text. Anything
that is not in a tag, or defining a tag, is text. Thats pretty basic,
eh?
Entryfield
This is where things start to get more interesting. In dBASE, the entryfield is called an entryfield. In HTML, it is called text! However, we know this because we are using the form element called input, and the type is text.
A simple entryfield in HTML is
defined in the following manner:
|
<input type="text" name="test"> |
|
What this looks like in an HTML form is:
This doesnt look like much, but it is a basic entryfield, pretty much as if you had placed an entryfield on a form in the form designer in dBASE.
If you want text to the left of this, you would simply type that text into your HTML page:
Attributes for this are very much like properties in a dBASE object. You can include a variety of attributes, including, but not limited to:
| Attribute | What it does |
| name | Gives a reference to the value when a form is submitted |
| size | Specifies the width of the input field in number of characters |
| maxlength | Specifies the maximum number of characters the user can enter |
| value | Specifies
the beginning value that is displayed
|
For the purposes of an HTML form, the required attributes for an entryfield are: name. Thats it. You have to name the entryfield (the same for all other objects, well talk about each as we get there).
The
value attribute, when
it comes to creating a web application, can be used to assign the current
value in a field in a table to the entryfield. This is useful for data
editing
Password
This is a special type of input
control. It works just like an entryfield, but obscures the value by masking
it with special characters as defined by your browser. In dBASE you have
to do some extra work to do this, in HTML, it is built in
To use a password
control:
|
<input type="password" name="testpassword" value="SomePass"> |
|
What this looks like in an HTML form is:
The checkbox is used for logical values; true or false. In dBASE (using level 7 tables) a logical field can be true, false or null. In HTML its more simple either true or false, there is no null option.
The thing about checkboxes in HTML is that when a form is submitted, if the checkbox is checked, a value is sent back to the web server; if the checkbox is not checked, then no value is returned. We will examine this when we get to the sample application. It can be a bit confusing.
Checkboxes are defined using the INPUT tag in HTML as is the entryfield (text) tag. The checkbox has the following attributes:
| Attribute | What it does |
| name | Gives a reference to the value when a form is submitted |
| value | If checked, what is passed back to the server? |
| checked | Specifies
if the checkbox starts out checked when the form is displayed
|
A basic checkbox in HTML will look
like:
|
<input type="checkbox" name="MyCheckbox" value="Check1"> |
|
Note that there is no place to enter text that is displayed with the checkbox. This is because you just add the text yourself, and you can add it before or after the checkbox.
A simple form with a couple of
checkbox options might look like (in source):
|
Select your preferences:<br> Chocolate: <input type="checkbox" name="ChocolateCheck" value="Chocolate" checked><br> Vanilla: <input type="checkbox" name="VanillaCheck" value="Vanilla"><br> Strawberry: <input type="checkbox" name="StrawberryCheck" value="Strawberry"> |
|
And in HTML this would look like:
Thats not a great layout, is it?
The text is lined up, but the checkboxes are not
(one option would be
to remove the <br>
tags, and all the checkboxes would be on one line
) Well come back to
layout a bit more, but a hint: think table
Radiobutton
Radiobuttons are used to define a list of options that can only have one value returned. The definitions for radiobuttons are very similar to checkboxes, however one very important thing: you group radiobuttons by the name attribute. That is how HTML knows to deal with the choices, and how to return a value.
A simple definition of a radiobutton
in HTML would be:
|
<input type="radio" name="MyRadio" value="RadioChoice1"> |
|
Using the same options that we
used for the checkbox shown above, but changing to radiobuttons, the HTML
would like like:
|
Select your preferences:<br> Chocolate: <input type="radio" name="FlavorRadio" value="Chocolate" checked><br> Vanilla: <input type="radio" name="FlavorRadio" value="Vanilla"><br> Strawberry: <input type="radio" name="FlavorRadio" value="Strawberry"> |
|
And in HTML this would look like:
Note that the layout issues are
the same as with checkboxes.
Editor
The editor control in dBASE can handle large amounts of text. In HTML the equivalent is called a textarea.
The textarea HTML element works differently than the input element. Among other things, it requires an end tag, and the text is placed between the beginning and ending tags there is no value property.
Basic attributes of the textarea element are:
| Attribute | What it does |
| name | Gives a reference to the value when a form is submitted |
| rows | Specifies the height in number of rows |
| cols | Specifies
the maximum width (in characters)
|
A simple
textarea element would
be defined as:
|
Notes: <textarea name="MyEditor" cols=50 rows=3>
|
|
In an HTML form it would look like:
The scrollbars would appear only
as needed, or might appear depending on how your browser interprets HTML.
Combobox/Listbox
The combobox and listbox can be defined in HTML forms using the select form element. For the select element you must define each item you wish to appear in the list. This is done using the option form element. You must always use an end tag for the select element.
Basic attributes of the select element are:
| Attribute | What it does |
| name | Gives a reference to the value when a form is submitted |
| size | Specifies the number of items to show - if this is omitted or set to 1, a combobox is shown. If set to two or higher, it works like a listbox. An interesting option for the listbox is if you specify the size to a value greater than the number of elements in the list, a "nothing" option is added. |
| multiple | Specifies
whether multiple options may be selected (user would hold the Ctrl key
while clicking
)
|
For a combobox, you would define
your select element this way:
|
Select a flavor: <select name="FlavorCombobox"> <option selected value="Chocolate">Chocolate <option value="Vanilla">Vanilla <option value="Strawberry">Strawberry </select> |
|
In an HTML form this would look like:
To change this to a listbox, you
would specify either the multiple attribute, or a height (set the size attribute to a value ...):
|
Select a flavor: <select name="FlavorListbox" size="3"> <option selected value="Chocolate">Chocolate <option value="Vanilla">Vanilla <option value="Strawberry">Strawberry </select> |
|
In an HTML form this would look like:
Note the location of the text for
this. Again, think table
. well look at that when we get to a real application.
Pushbutton
HTML forms come with two default pushbuttons, and if you want to learn about JavaScript, you can do even more with them. For our purposes we will simply deal with the basic buttons that are part of HTML.
The two options for pushbuttons are created using the input element, and are reset and submit. The reset button clears out the elements on a form, resets default values, etc. The submit button actually will submit the form to the web server, passing the values to the application specified in the form tag (we havent looked at that yet ).
To code a reset button in HTML you have one attribute that is optional, which is value this is the text that appears on the button. If you leave it off, the default value of Reset will be used.
Note: It is possible to do a lot
more with pushbuttons than what is shown here, but for that you need to
learn to use JavaScript, which then allows you to program your pushbuttons
...
|
<input type="reset"><br> <input type="reset" value="Clear the Form"> |
|
In a form, this would look like:
A submit button looks the same,
except for the type:
|
<input type="submit"><br> <input type="submit" value="Send It In"> |
|
In a form, this would look like:
Now that you have the basics for creating form elements in HTML, we need to consider actually creating an application
Back
to the Menu
A
Simple dBASE Web Application
At this point we are going to go through the steps of creating a very basic dBASE/Web application. Once again, this assumes you have some knowledge of dBASE coding, and there are things that will not be explained in a lot of detail.
dBASE uses CGI (a standard web technology) for web applications, but it uses a trick it passes and receives information using the dBASE File object, and streams the data through the StdIn and StdOut ports of the operating system. This means that it is creating virtual web pages that are streamed directly through the web server, and reading the data straight from the web server, without ever having to write it anywhere else first.
We will be using a custom class that ships with dBASE which will do some of the work for us.
For our application we will assume that we need a few specific capabilities: View the current data; add new data; edit current data; and delete data. We could add reporting options, and we could do a lot more, but were going to keep this simple.
I have found that most of the time it is useful to have a front-end HTML page that only changes if I need it to. This is called a static page. The pages that are generated by dBASE code are what are called virtual pages they are created on the fly, and are passed directly through the server to the web browser the actual HTML page does not exist anywhere on the server. That is one of the great strengths of using dBASE to create web applications; it can stream the HTML directly to the server and the end-user. This is very fast!
Lets start with a basic application definition. Let us assume that you are creating a way for sales representatives to store customer information. We wont worry about the actual sales end of things, that would be a much more complex application, and were just learning right now.
You could create a login screen, but most web servers handle authentication of that nature. We wont deal with that. Lets assume that your sales representatives already have access to the server, and because your server is set up with appropriate security, only someone with a user ID and password can get in. So security is not our concern
Once your sales rep logs in, you will want them to view a specific HTML page that might be considered to be a menu for your application. You would need to have options for each program although as youll see, some of this has been simplified into just a couple of options:
The sample application already
has a table defined, with an attempt to use some of the various interface
controls mentioned in the previous section. As we define this application,
we will look at all of this.
Folder
Design And Layout
When it comes to design, there are many ways to do things. A lot might depend on the network guru at your firm, for example. He/she may have a very specific design in mind, based on security concerns, for example.
Once again, were keeping this simple for the purposes of this discussion, but note that the best thing about a good design is that it doesnt really matter where your tables are (use a BDE Alias); or where the code is in relation to them.
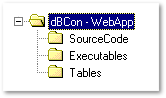
For this example, note that the menu will be in the root folder, the Source Code will be in its own folder, the compiled application will be in yet another folder, and finally the data will be in a folder of its own.
This gives a layout like:
Each of those is a folder. In the
dBCon-WebApp folder is the main menu (which we will discuss later),
the SourceCode folder is where we will be developing our application,
the Executables folder is where will we put the compiled application,
and the Tables folder is where the data will reside. For this application
to work properly, we are using a BDE Alias which points to the folder with
the tables. This allows us to move the tables if needed and not change
anything in our application code.
dBASE
Web Classes
dBASE Plus ships with a custom
control that can (and should) be used with web applications. It takes care
of a lot of the work that you might have to do otherwise. You can examine
the web classes by opening the file:
|
modi comm :webwizards:WebClass.cc |
|
It is not a good idea to modify the base class. However, you can create your own subclass of this easily. You may want to close the source editor, just to be safe
For our purposes, were going to assume a company called Golden Stag Productions, and so we will see names that reflect this in various places.
For example, from the Command Window:
|
modi comm GS_WebClass.cc |
|
For the example I have created a subclass of the Webclass itself, which will allow me to add my own code, override anything I might wish to, and leave the rest as is.
The class used here includes some new methods:
|
oCGI.fOut.puts( SomeString ) |
|
Is this:
|
oCGI.streamDetail( SomeString ) |
|
Any better syntax-wise than the previous command? Not really, but it adds a bit of consistency when you use a lot of the other methods of the WebClass.
For the most part, we will be using a different technique than streamDetail() to put output together to send to the browser. There are reasons why it might be useful to send output directly across, one command at a time, but there is one drawback: If you use the default errorPage() or sorryPage() methods of the CGI object, your output can get very odd. If you have already started streaming output to the browser, and then an error occurs, it can be interrupted and then the output from the errorPage() or sorryPage() methods will be displayed, and these screens will not look very professional.
Bowen Moursund (I believe) came up with a better technique, which is to build an output string, and send the whole thing at one time to the browser. To facilitate this, the GS web class uses a string: oCGI.cOutString, and on instantiation defaults it to a null value. During the processing, we add to the string (you will see this in the code samples), and if no error occurs, we will output the whole string. We can get away with this because dBASEs strings can be very large (the only known limitation is the amount of memory available on the computer ). If an error occurs, or we have a need to use the sorryPage() method, we dont have to worry about a poor-looking display.
There is an overridden method:
Yes, But What Does It Do?
After all that, what exactly does all this code do? Briefly, the CGISession class which is found in :WebWizards:WebClass.cc, is the main interface for web applications for dBASE. It handles communicating with the server, and passing/receiving data to/from the server.
If you closely examine the code for WebClass.cc, you will find that CGISession is a subclass of an associative array. However, the methods of the class, such as Connect(), actually create connections to the web server, using the StdIn and StdOut (Windows API) capabilities of the web server. Some other methods which we will be using store information in the associative array, allowing us to send data out to the server and to read the data that is returned from the server.
Back
to the Menu
Creating
the Application
In order to create a web application, there are some basic concepts that you need to consider, besides any design and appearance issues.
First, you should always use error trapping in every program you use on the web. The reason? With the exception of Apache (and maybe some others), most web servers dont show dBASE error dialogs. Even if you are using Apache, is someone going to be monitoring the web server itself for errors? If you trap your errors using the dBL try/catch/endtry dialog, you can display an error message for the user, asking them to contact the web minister, and you do not hang the server (hanging the server means that it is locked up, waiting for a user response ).
Second, try to remember that dBL
is object-oriented, and that even though the code you are creating is more
procedural than it is in the Windows environment, OOP is still a good and
useful thing.
Starting
Your Application
Most of my web applications start
the same way:
|
// open the procedure file: set procedure to GS_WebClass.cc additive // create an instance of the class: oCGI = new GS_WebClass() // Set Up the connection for StdIn/StdOut ... oCGI.Connect() // Set the web master address, used in the error code oCGI.setWebMasterAddress("MyEmail@somewhere.com") |
|
Depending on what needs to be done from there, the code tends to be placed inside a big wrapper try/catch/endtry, and sometimes there are smaller bits of code also wrapped in them.
For example, the next thing that
needs to be done is to open the database, and so on. For this I tend to
wrap just that code in a try/endtry block, and use the webclass errorPage() if an error occurs:
|
try // open the database: dCustomer = new Database() dCustomer.databaseName := "dBCon-WebApp" dCustomer.active := true // open the table: qCustomer = new query() qCustomer.database := dCustomer qCustomer.sql := "select * from Customers" qCustomer.active := true // create some shortcuts: rCustomer = qCustomer.rowset fCustomer = rCustomer.fields // set the index: rCustomer.indexName := "LastFirstNames" catch( Exception E ) oCGI.errorPage( e ) endtry |
|
From here of course, the code will all change. However, knowing that it all starts the same is useful. We could, for example, store all that in a program file, and then use a pre-processor directive to INCLUDE the file in all of our programs. That way any changes could be made in one place. Were going for simple, after all
Back
to the Menu
View
The Data
This code may seem like it should be simple, and to an extent, it should be. Were not actually creating an HTML form, for example. Were going to create what is called a drill down report. What this means is that its a list of data with the option to drill down to the full record.
What were going to do here is display part of the customer data customer number, name, city, state and postal codes. If a sales rep then wants to view more data (allowing them, in this case, to edit it!) we need to give them a place to click and bring up more data.
The place to click uses an HTML tag type that we havent discussed yet:
Anchor Tags
One HTML tag (of many) we havent looked at is called an anchor it is used to provide links either to other web pages, or to programs, websites, email addresses, and more.
The basic syntax for the anchor
tag is:
|
<a href="what you need to happen">Some Text</a> |
|
For example, to place a link to,
say, my personal dBASE website from here:
|
<a href="http://www.goldenstag.net/dbase">Goldenstag dBASE Page</a> |
|
which would look like: Goldenstag dBASE Page
Okay. Now we have discussed the anchor tag
This should be pretty simple, except that in order to get our data to display in a manner that is easy to read (columns lining up, etc.), we are also going to work with HTML Table tags. We will discuss each as we go.
What we are going to be doing is quite literally simply streaming a lot of HTML tags out to the end-users browser. There is no interim or temporary HTML file involved we never store the HTML tags anywhere on the server, except in the dBL program that creates the HTML output.
The basic program should always stream out the beginning tags for our HTML, some of which was discussed earlier, and is in the file GSCustomerStartCode.prg.
When outputting data using HTML tables, there are a variety of things to consider. For example, do you want a border around the cells in the table? What kind of formatting do you want? etc. We are going to keep things as simple as we can, but
Table Tags
There are several HTML tags used
when working with tables. The first is to start the table (and dont forget
to end it):
|
<table> |
|
Everything after the begin table tag until we reach the end table tag should be part of the table. While this is not necessary, as some browsers will assume that if the correct tags are missing that the information should be displayed elsewhere (in Netscape what usually happens is that if tags are missing, the information is displayed BEFORE the table this can be a bit confusing, but there you go ), you should think about your design, and try to be careful.
The next table tag that needs to
be considered is the Table Row tag, which has an end tag as well:
|
<tr> |
|
If you want to, you can create
table headings using the Table Header tag (by default the table header
text is bold and centered in the column
):
|
<th> |
|
And finally we get to the most
important part, that which defines the individual cells of the table (or
in dBASE consider the individual fields for the row), the Table Data tag:
|
<td> |
|
Each of these tags have attributes, some of which we may use for this simple display, some of which we probably wont.
Start The Output
The following is the beginning
of the code being used in the demonstration program.
|
// start the table: oCGI.cOutString += [<center><table border="1">] // Stream out some headings for the columns:
// Move to the first row in the rowset:
// loop through the table, outputting the
data we need:
// for each row of a table,
we need a <TR> tag -- "Table Row":
|
|
Output of Action Types with Anchor/Link
To output the actions that a
user may take, the code will appear more complex than it really is. Thats
because among other things we are ensuring that we are able to pass the
customer number as a parameter to the program we will be calling (when
the user clicks on the action), as well as actually displaying the text
for the action. If you take a good look at the code below it should make
sense, but we will break it down a little:
|
oCGI.cOutString += [<td>] oCGI.cOutString += [<a href="EditCustomer.dbw?CustomerNum=]+; fCustomer["CustomerNum"].value+[">]+; 'edit'; [</a>] oCGI.cOutString += [</td>] // some blank space:
// delete...
|
|
The first and last lines are the Table Data tags for the display of the information. The second command (the one that wraps over four lines) is the important one to examine here. We are outputting an anchor tag, but note that rather than calling a web page, we are calling the program EditCustomer.dbw. Also note that there is a question mark (?) in there, followed by CustomerNum=. The question mark tells the CGI handler of the web server to pass what follows as parameters, and parameters in CGI applications are name/value pairs (somename=somevalue). The next line places the customer number in the tag. After that we end the first part of the anchor tag (">) and then we tell dBASE to add to this string the type of the action (in this case, the word edit) this is in the place of the text to display for the anchor. Finally we have the end anchor tag (</a>).
As we are going to be allowing the user to delete a customers record as well, note that we have the option to delete (shown in the code above). This calls a different program, but also passes along the customer number to it.
The actual data
The following is the rest of the
output code for the data
Its not really necessary to display the customer
number, but for now well leave it in. Its not exactly hurting anything.
|
// Customer Number: oCGI.cOutString += [<td>] oCGI.cOutString += fCustomer["CustomerNum"].value oCGI.cOutString += [</td>] // Customer Name:
// City:
// Postal Code:
// we are done with this row,
add the end TR tag:
// move to next row in table
(bad idea to leave this out!):
enddo // close off the table:
// output the output string:
|
|
The end of the program
The rest of the code for the program
is pretty straight-forward, and is just used to add some final output and
end the program:
|
// done with the data ... // add an anchor tag to go back to the main application menu oCGI.cOutString += [<p><hr><p>] oCGI.cOutString += [<a href="../index.htm">Main Application Menu</a>] // ---------------------------------------------------
// we're done. While not absolutely necessary,
this can't hurt:
// code not shown for the end of the try/catch ... |
|
Back
to the Menu
The
Editing Program
Note that in order to edit a row, you have to know what row to edit. If you have looked at the code to display the customer data (above), you will recall that the word edit has an HTML anchor tag that points it at the edit program, and passes as a parameter the customer number.
We have to, in our code, get this
information and use it to find the row in the table that we need to edit
and display. Once we have found the row, then we need to let our user see
it. If it turns out that for some reason that row is not in the table (either
a problem in our code or someone has deleted it, or
?), then we need to
tell the user that.
|
// we should have a parameter and we need to try to find // the value passed: try if not rCustomer.applyLocate( ["CustomerNum="+oCGI["CustomerNum"] ) oCGI.sorryPage( "Customer Number: "+oCGI["CustomerNum"]+" was not found ..." ) quit else rCustomer.filter = "CustomerNum="+val( oCGI["CustomerNum"] ) endif catch( Exception E ) oCGI.errorPage( e ) endtry |
|
Note that sorryPage() is a method of the main web class that we are using.
Assuming we get past this point, we need to send the HTML through to the user to display the current row, with the ability to edit the data.
What I have done with this code is to place all of the code necessary to output the customer data as an editable screen into a method of the web class. The reason for this is that it will be used in at least two places, and updating the screen design more than once is difficult and can be confusing after awhile. (What if you add something in one screen, but not the other? What if the design is different in one screen than the other?).
There are some things that get
done before displaying the screen, however.
|
try // First some really basic stuff (center, some title stuff, // end/center): oCGI.cOutString += [<center><font size="+2">Customer Data</font><br>] oCGI.cOutString += [Date: ]+date()+[</center>] ) oCGI.cOutString += [<p>] ) // Need to stream out the
'begin form' tag, with the name of the
|
|
The code shown above displays some
header information, including the date, and then it calls the method to
return the tag that defines the beginning of a form. This tag, when used
with a CGI application (as opposed to the sample code given in this paper
when discussing HTML form controls), needs to have an attribute called
method which defines the
type of action to execute, and an attribute called
action which defines the
program or HTML page to be loaded when the user submits this page, and
finally it is a good idea to use the enctype
attribute.
What needs to be actually streamed out is a tag that looks something like:
|
<form method="post" action="EditCustomer2.dbw" enctype="application/x-www-form-urlencoded"> |
|
Display/edit the data
The method getFormBegin() simply takes the name of the program used in the action attribute, and builds this string, then returns it.
Next we need to call the screen
used to edit the data:
|
// display the editing screen: oCGI.getCustomerScreen("Edit") |
|
This command calls the method getCustomerScreen(), and tells it that we are going to be editing a row. By using a parameter we can call that code from here and the append program, and it can create the appropriate controls. With the edit mode, we are going to be pulling data from the row that was selected.
The following is a small example
of some of the code in the getCustomerScreen()
method,
just to give an idea how it works. If you need to really examine it, open
the class in the source editor
|
// If adding a new row, we can set any defaults we might // want to set, and that should be it: parameter cType // first, a table:
// For this to work in a sensible fashion,
we're going
// if we're editing a row, let's display
the customer
// we also need to create
a hidden value that can
// Next the name fields:
|
|
As noted, that is just an example. Theres quite a bit more. Notice that we check to see if we are in Edit mode, and we are, we modify our processing to return the currently selected value for the fields.
Hidden?
An important thing to note is the hidden value for the customer number. We are displaying the customer number in the form, but as a read-only (i.e., text) display. In order to pass this along to the next program, we need to output it in some fashion. We could have opted to display the customer number in a text control, but that would imply to the user that they can change this number and of course if they did change the number problems would occur when attempting to save the record. HTML provides us with an alternate way of doing this for our CGI applications, and that is the hidden control. It acts like other controls in that it needs a name, and a value, but as it does not actually display, the user is not ever going to see it. This value gets passed along to the next program exactly like the items that are displayed.
Back to the Edit Program
Once we have the screen displayed,
we need to finish up the bottom of the screen:
|
// here we set up the pushbuttons at the bottom of the screen: oCGI.cOutString += [<center>] ) oCGI.cOutString += [<input type="submit" value="Save Changes">] ) oCGI.cOutString += [ ] ) oCGI.cOutString += [<input type="reset" value="Abandon Changes">] ) oCGI.cOutString += [</center>] ) // end of the form:
// add an anchor tag to go back to the
main application menu
// stream the screen out:
// ---------------------------------------------------
// the rest of the code is the 'quit' command
and the end of the try/catch/finally
|
|
Now That We Have The Data, What Next?
Well, the <form> tag specifies another program get executed. Why do we need to do that? A well behaved Windows application keeps the row active and we can just issue a call to the rowset.save() method. Well, you have to realize that while your application is running on a Windows server, once the data is sent to the browser, your program has stopped execution in other words, there is nothing for it to do at this point. The program titled EditCustomer has completed its work, and is done. Web applications are quite different from Windows applications, and you have to keep that in mind as you design them
In this case, we are going to call a second program that will find the customer number, and then replace the data in the row with the data that the user has entered and passed when the Submit button was pressed.
What happens when the user submits a form is that the values of the various web controls get passed through the server to your dBL code. You then need to know what to do with that information.
The program will be called (for lack of a better name) EditCustomer2.dbw. The beginning of the program is the same as for EditCustomer.dbw. However, from this point it does change a bit. Once we have found the row, we need to actually write the data to the fields in the table. For most controls this is pretty straightforward, but we are using radiobuttons and checkboxes, and we have to handle those a little differently, for example.
Another thing to keep in mind is that the values are being returned as elements of the oCGI object, and they are returned as elements of the associative array. Associative Arrays are case sensitive, which is something that throws a lot of dBASE developers off, as most of the time dBASE is not case sensitive when it comes to referencing objects, variables, and such.
Data Validation
The first thing we should do is deal with any data validation make sure that the user entered data correctly based on any criteria required by your application and the table design. The only thing that I am going to do for data validation for this very simple application is to check to make sure that there are actually values in the first and last name fields.
The following is an excerpt from
the data validation code:
|
// ----------- Validation of Data --------------- // This is the spot to do that -- before we try // actually updating anything ... // For this example, the only real validation // I'm going to do is make sure the first and // last names are filled in. You can get as complex // as you need to. if empty( oCGI["FirstName"] ) oCGI.sorryPage( "Customer First Name is required! It cannot be left empty.",; "Data Error" ) quit endif |
|
That doesnt look that bad, and its not. What this does is pretty basic it checks the name/value pair that was passed to the CGI object in dBASE (which is an associative array) to see if its empty. Since this particular object is an HTML Text object (equivalent to a dBASE entryfield), it will always return a value, even if it is empty. If the value is empty, we call the CGI objects sorryPage() method, and give some explanation of the problem. This method includes text that tells the user that they can click the Back button of their browser, and so on. The quit command ensures that no further processing occurs here.
Your data validation can be simple, as above, or it can be much more complicated, based on the needs of your specific application. If, for example, you needed to verify a credit card number, you could put all that here
Saving the Data
Once your program gets past any data validation, then you of course need to save the data to the table. This can get a bit more complex, and were just going to look at the basics here. The reason for the complexity is that in the case of checkboxes and textarea controls, a value may be returned, or not. So you have to check for these.
Heres some code:
|
// now to actually attempt to save the data ...: rCustomer.beginEdit() // the way we do this is assign values
for fields
|
|
Thats pretty simple stuff. The
next bit gets a bit more complicated, but its not horrible:
|
// now we deal with the logical fields, which were done // using checkboxes. CGI handles checkboxes differently // than entryfields -- if the value is returned, the // checkbox was checked, if not, it was unchecked. There // is no null value here -- it's either considered to be // true or false: fCustomer["ContactViaEMail"].value := oCGI.isKey( "ContactViaEMail" ) fCustomer["ContactViaPhone"].value := oCGI.isKey( "ContactViaPhone" ) fCustomer["ContactViaPostal"].value := oCGI.isKey( "ContactViaPostal" ) |
|
What the code is doing is if there is a value returned by the checkbox, then we tell dBASE that the value is true, if isKey() returns a false value, then the checkbox was unchecked in the HTML page, so we store a false value in the table. Note that HTML does not deal with null values for checkboxes. If you really need null values for your logical fields, then you may want to use either radiobuttons or a combobox (select object in HTML/CGI apps).
The rest of the code for saving
the data is pretty straightforward:
|
// Radiobuttons -- in this case, the "MaleFemale" ('sex') buttons: // In this case CGI returns the 'value' of the selected // radiobutton: fCustomer["MaleFemale"].value := oCGI["MaleFemale"] // Next we have values from a listbox:
// and finally, the notes/memo field --
taken from
// save everything:
|
|
Finishing up, and The Response Page
At this point, the data has been
saved to the table. We could stop here, and not do anything else, but your
web app, to be a proper CGI application, should always return a response
page. The response page in this case can be as simple as telling the user
that the data was saved, and then allowing them whatever options you wish
|
// The Response Page: // First some really basic stuff (center, some title stuff, // end/center): oCGI.cOutString += [<center><font size="+2">Data Saved</font><br>] oCGI.cOutString += [Date: ]+date()+[</center>] oCGI.cOutString += [<p>] // give the user some options as to what
to do ...
// stream the whole thing out:
// the standard footer:
// quit:
// The rest of the code in this program
is the end of the try/catch,
|
|
Back
to the Menu
Deleting
A Row
The only real coding part that needs to be done is dealing with deleting a row. The beginning of the code will be similar to the code in the Edit program, but we will not be actually editing anything. We will display SOME of the data from the row, ask the user if they really want to delete it, and so on. This is similar to the way most Windows applications handle deleting a row in a table.
As with the edit option, we will have two programs, but they are both relatively simple.
In the first, we will display some of the data from the row that the customer has asked be deleted, and they must then click on another link to actually delete it. We could have used a JavaScript confirm dialog, but that gets more complex than I wanted to get into here, so were going for simple.
The following is what some of the
code looks like:
|
// First some really basic stuff (center, some title stuff, // end/center): oCGI.cOutString += [<center><font size="+2">Delete Customer Data</font><br>] oCGI.cOutString += [Date: ]+date()+[</center>] oCGI.cOutString += [<p>] // Display some of the customer data --
this is "lifted"
// first, a table:
// Customer Number:
// Next the name fields:
// code trimmed there is more in the actual program // finally let's end the table:
// Give the user the option to delete this
by clicking
// some blank space:
// Give user the option to return to Display
...:
oCGI.cOutString += [</center>] |
|
Delete A Row, Part 2
Okay. That was the first part of
the process. Once the user clicks on the link to actually delete the record,
what happens? Its pretty simple. The program
DeleteCustomer2.prg is
very similar to this one, it shows the same data, but rather than displaying
the link to delete the row, we do the following:
|
// Actually Delete the record: rCustomer.delete() // let the user know ...
|
|
Back
to the Menu
Adding
New Data
This code is remarkably similar to the code used to edit data, so less explanation will be added. All I intend to do is show the basic changes necessary in the code to add a row, etc.
This is really simple. We can copy
the edit code in EditCustomer.prg,
and then make the changes necessary I have boldfaced the parts that were
changed:
|
// First some really basic stuff (center, some title stuff, // end/center): oCGI.cOutString += [<center><font size="+2">New Customer Data</font><br>] oCGI.cOutString += [Date: ]+date()+[</center>] oCGI.cOutString += [<p>] // Need to stream out the 'begin form'
tag, with the name of the
// display the editing screen:
// here we set up the pushbuttons at the
bottom of the screen:
// end of the form:
|
|
Adding A Row, Part 2
For part one, that is really all
we need to do. For part two, we will have to do very similar things as
in the second part of the customer edit, including data validation. As
a matter of fact, if handled properly, we can copy that program and again
make minor changes.
|
// now to actually attempt to save the data ...: rCustomer.beginAppend() // the way we do this is assign values
for fields
// from here down, the rest of the code
is very similar,
// The Response Page:
// show new customer number:
// and from here it's very much like before ... |
|
Back
to the Menu
An
HTML Menu/Front-End
Were going to give the users of this application a simple HTML menu.
This is simple, and is in the code samples as index.htm. The file has a header, two menu options, and a footer. Thats all that is really needed for this very simple web application.
Back
to the Menu
Pulling
It All Together
Rather than using the project explorer in dBASE to create our executables, I have found it easier to just create a simple program that builds the executables. This can be run and when done all of the executables are done and ready to go.
For this application the program
looks like:
|
// This program is used to create the executables used for // the sample application for dBCon 2004 by Ken Mayer: // it compiles each file that needs compiling, then // it builds the actual executables, using the .DBW file // extension. Details on this can be found in the OLH, // and in the paper for the conference. // This is the path to where the exes will
be stored:
// check for image files, copy if needed:
// Compile individual programs and required
source code:
set safety off
// Just so it looks like something happened:
|
|
Running this program will compile the source code and build the executables from the source code, storing it in the location designated by EXEPath. Using the web parameter means that the runtime will not attempt to load any of the normal dBASE User Interface controls, making the load time much faster for each executable.
Back
to the Menu
Wrap-Up
As noted repeatedly through this paper, this is a simple application. One might ask Why did you do things in this fashion rather than ...? and the basic answer is that You could do it that way, this is the way it made sense to me at the time . Just as with regular Windows applications, dBASE Web programming is quite flexible, and there are many ways one can approach coding just about anything. Is there one right way? Not really. Find a method that works for you. There may be a more efficient way, but as long as what you are doing works for you and your users, it is correct.
IIS Issues
There are various issues involved with using IIS (the default web server that comes with Windows NT, XP, etc.) and dBASE Web Applications. A few issues that came up when various folk were asked are described here.
an issue from a programming point
of view is that the applications current folder is the servers root.
The following is, I believe, Bowens (Moursund) suggestion for handling
this. Ive added to my subclass of webclass.cc
and
then forget about it. Michael Nuwer
|
// Ensure that working directory is app directory: set directory to left(_dbwinhome, len(_dbwinhome)-1 ) |
|
One glitch that Bowen encountered was on the server for the dBASE Bug System: I think that the IIS/Windows security on the machine was misconfigured, and that the problem is not a general problem. The solution found by trial and error was to bypass the security glitch by ensuring that all web applets had 8.3 names.
Also from Bowen Moursund: Some IIS and general tips off the top of my head:
Apache Issues
Maybe relevant, maybe not. Setting
up a reverse proxy with IIS (from Chris Neumann as well):
http://www.winnetmag.com/Web/Article/ArticleID/8322/Web_8322.html
BDE Issues
The Borland Database Engine (BDE)
can only handle 48 users concurrently. In many cases with a dBASE Web application
this is not really much of an issue, as the code executes and is done relatively
quickly. Below is some code provided by Bowen Moursund (via Michael Nuwer
again) for this basically it allows you to tell the user to try again
if the limit is hit:
|
#define BDE_CLIENTSLIMIT 35 if not UnderBDEClientsLimit( BDE_CLIENTSLIMIT )
Function UnderBDEClientsLimit( nLimit )
|
|
Other sources to learn more about dBASE Web Applications
Michael Nuwers pages:
dBASE Developers Bulletin Articles: dataBased Intelligence, Inc. Website: Sample Applications:
John Creeds Applications
(The first one is a project management tool for scaffolding inventory
& rent, other inventory, payroll and invoicing. The second one is an
online store that uses my shopping cart system. The last one has an onLine
application form, and a private virtual onLine office center to run their
business.)
Includes a different article with a different approach written some time ago by myself, in the Intermediate section. There is an article in there as well on comparing the dBASE form controls to Web form controls.
|
(it is a 27 Kb zipped file) |