MS
Word Mail-Merge.how
by Gary White,
dBVIPS
Example files
for this document are in copy4.zip.
Performing
a mail-merge can be a very beneficial part of an application. We've all seen
those organizations that store massive amounts of data. They generate blizzards
of paper printouts of every conceivable piece of information. They, in fact,
generate so much paper that it becomes useless. They bury themselves in data,
to the point that it becomes meaningless and can be put to no good use. A mail-merge
is one way of using that stored data that will provide a tangible, beneficial
result. We'll use the dBASE OleAutoclient class to accomplish this task.
OleAutoclient
The OleAutoclient class
creates an OLE2 controller that attaches to an OLE2 server. This simply means
that it starts an instance of the appropriate application that acts as an OLE
server and sets up the lines of communication. The OLE2 server is the host application,
in this case Microsoft Word. The OLE2 controller is the object reference you
create in your dBASE application. For example, the following statement creates
an instance of Microsoft Word:
oWord = new oleAutoclient("word.application")
TIP:
In some instances, the installation for MS Word does
not create a "version independent" registry key. In those cases, you
will need to specify the version of Word as "word.application.8" for Word97, or whatever version of Word you are
using. You can find the correct terminology by starting RegEdit and searching
for "word.application" and seeing the way it is listed in the registry.
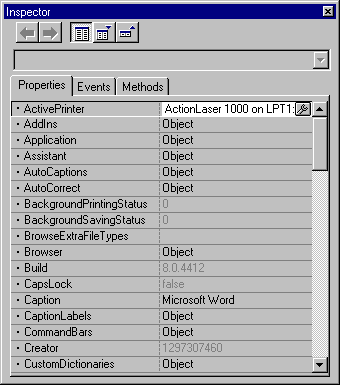 Once
created thusly, you can type inspect(oWord) in the command window and,
after a rather lengthy wait (there are a lot of things to load), view its properties,
events and methods. With a lot of trial and error, you could probably use just
that information to use the created object. You could see the properties, some
of which may even have a drop-down list of choices. You can inspect other objects
to which this one was related.
Once
created thusly, you can type inspect(oWord) in the command window and,
after a rather lengthy wait (there are a lot of things to load), view its properties,
events and methods. With a lot of trial and error, you could probably use just
that information to use the created object. You could see the properties, some
of which may even have a drop-down list of choices. You can inspect other objects
to which this one was related.
However, a better approach is to use the documentation
supplied with the application with which you want to connect. In the case of
MS Word, the Word Visual Basic help file should get you started. Note that the
default installation of Word does not include this file. You need to select
"Custom Installation" during the Word installation and specifically
select the VB help files for those applications you want.
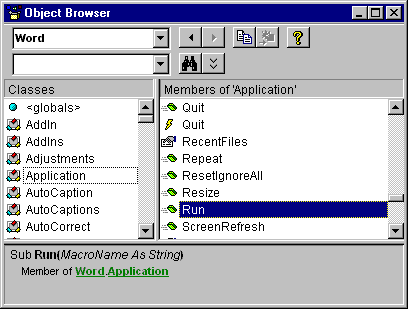
Another invaluable source of information for MS
Office applications is the Visual Basic Object Browser. In this example, if
you start MS Word, then click on the Tools menu, then click Macro, and then
Visual Basic Editor, you will see the VB editor. Once there, click View
and then Object Browser. The Object Browser will show you all the defined constants,
the properties, the events and the methods along with appropriate parameters.
Between the inspector in dBASE, the Word Visual
Basic documentation and the object browser, you should be able to get a pretty
good idea of what you can and cannot do with MS Word. The below diagram, from
the Word Visual Basic help file, depicts the Word97 object hierarchy.

 About
now, you may be saying how you don't know Visual Basic and you aren't really
interested in learning it. Well, fear not. You'll not need to know much. You
can often let MS Word do much of the work for you. And just how do you perform
this magic? By simply recording a macro in Word while you do what you want done.
Then you just look at the generated source code for the macro and translate
that into something dBASE can pass to the to Word.
About
now, you may be saying how you don't know Visual Basic and you aren't really
interested in learning it. Well, fear not. You'll not need to know much. You
can often let MS Word do much of the work for you. And just how do you perform
this magic? By simply recording a macro in Word while you do what you want done.
Then you just look at the generated source code for the macro and translate
that into something dBASE can pass to the to Word.
Getting
Started
Let's begin with something very simple. Let's assume
you want to print a Word document. Begin by starting MS Word. Click Tools
-> Macro -> Record New Macro. Give the macro a name, or accept the default
(Macro1) and click OK. Next, open the document you want to print, and then click
the print button on the Word toolbar. Finish, by clicking Tools -> Macro
-> Stop Recording. Now, let's examine the generated code. Click Tools ->
Macro -> Macros. Select the macro you just recorded and click the Edit button.
This will open the Visual Basic Editor with the generated code. It will look
something like this:
Sub Macro1()
'
' Macro1 Macro
' Macro recorded 04/26/99 by Gary White
'
    Documents.Open FileName:="Doc1.doc", ConfirmConversions:=False, ReadOnly:= _
        False, AddToRecentFiles:=False, PasswordDocument:="", PasswordTemplate:= _
        "", Revert:=False, WritePasswordDocument:="", WritePasswordTemplate:="", _
        Format:=wdOpenFormatAuto
    ActiveDocument.PrintOut
End Sub
As you can well imagine, dBASE would choke if it
tried to execute that code. So how do you get this to work in dBASE? A couple
of general guidelines:
- You cannot use named parameters from within
dBASE. This means that you must supply all parameters up to and including
the last one you want to send.
- Any Word method, when called from dBASE, must
include parenthesis even if there are no parameters.
So let's see what this looks
like in dBASE:
oWord = new ;
   oleAutoclient("word.application")
|
First,
create the instance of Word |
oWord.documents.open( ;
   "C:\My Documents\Doc1.doc", ;
   false, true )
|
Next,
open the document. While the recorded macro includes a whole bunch of parameters,
if the document is a Word document and it is not password protected, you
can safely ignore everything but the file name. The file name you use should
include the full path to the document. Since the file name is the first
param, that's all you really need. However, the possibility exists that
another user could have this document open, in which case, a nasty dialog
box would be displayed asking what to do next. In our case, all we want
to do is print the document, so we can safely open the document as "Read-Only"
to avoid that. Neither do we want to worry about dialogs asking about converting
a document that may be from a prior version of Word. So, in this case, we'll
supply a couple more params. The first one, following the file name is a
FALSE to indicate no prompt for conversion and the second will be a TRUE
to indicate opening "Read-Only". Note that you MUST use parenthesis
to enclose the param. |
oWord.activeDocument.printOut()
|
Next,
print the document. Once again, note the parenthesis, even though there
are no parameters passed |
oWord.quit( 0 )
|
Now,
we close Word (you can find information about the quit method in the Word
VB help file) |
release object oWord
|
Dispose
of our oleAutoclient object |
oWord = null
|
Finally,
stub out the reference to make sure it's released |
With just 5 lines of code, you have created a Word
instance, loaded and printed a document, closed Word and cleaned up after yourself!
In fairness, a real application should include some minimal error checking to
allow it to fail gracefully and abort if necessary. Cases where the Word Application
info not found in the registry, or the file is not found, or the printer is
not connected should be included in error trapping. A series of nested TRY/CATCH
structures should handle that with a minimum of effort.
The exciting part is that you've not even scratched
the surface of the potential uses for this technology. If you've tried the above
code, you will have noticed that you never saw an instance of Word. It was all
handled transparently. If you wanted to open a document and allow the user to
edit it, all you need to do is set your reference to the OleAutoclient's visible
property to True (and, of course, don't open it read-only):
oWord.visible = true
This document will examine three methods of creating
the mail-merge document. Each has its advantages and disadvantages. You'll have
to decide which is best for use in your particular application. Note that the
following pages are intended to be read in order. Each builds on the information
in preceding pages and avoids excessive repetition by leaving some things out.
Note that, by default,
the macro you recorded will be saved in your "Normal" Word template.
It would be a good idea to delete any macro you do not want permanently available
in all your Word documents. You do this in Word, by clicking the Tools menu,
then Macro, then Macros. Highlight the name of the macro you want to delete
and click the Delete button.
ACKNOWLEDGEMENT: Thanks to Ken Mayer and Geoff
Wass for their help with this document.
DISCLAIMER: the author is a member of dBVIPS. dBVIPS
stands for dBASE Volunteer Internet Peer Support. It is a group of volunteers
who provide technical support for dBASE, Inc. in the Visual dBASE newsgroups
(news://news.dbase2000.com). If you
have questions regarding this .HOW document, or about Visual dBASE, you can
communicate directly with the author and other members of dBVIPS in the appropriate
newsgroups on the internet. Technical support is not currently provided by private
E-Mail by members of dBVIPS. dBVIPS members are NOT employees of dBASE,
Inc., but are unpaid volunteers.
.HOW files are created as a free service by members
of dBVIPS to help users learn to use Visual dBASE more effectively. This .HOW
file MAY NOT BE POSTED ELSEWHERE without the explicit permission of the author,
who retains all rights to the document.
Copyright 1999,
Gary White. All rights reserved.
Information about
dBASE, Inc. can be found at: http://www.dbase.com
The most current version of this document,
along with other, hopefully helpful, files may be found at the author's web
site: http://www.apptools.com/dbase
Last modified November 9, 1999